Drive Time Buffer
How to create a drive time buffer from a Point
- Select the point you wish to add a drivetime buffer to.
- When the data window appears select the buffer option
- Choose drive time
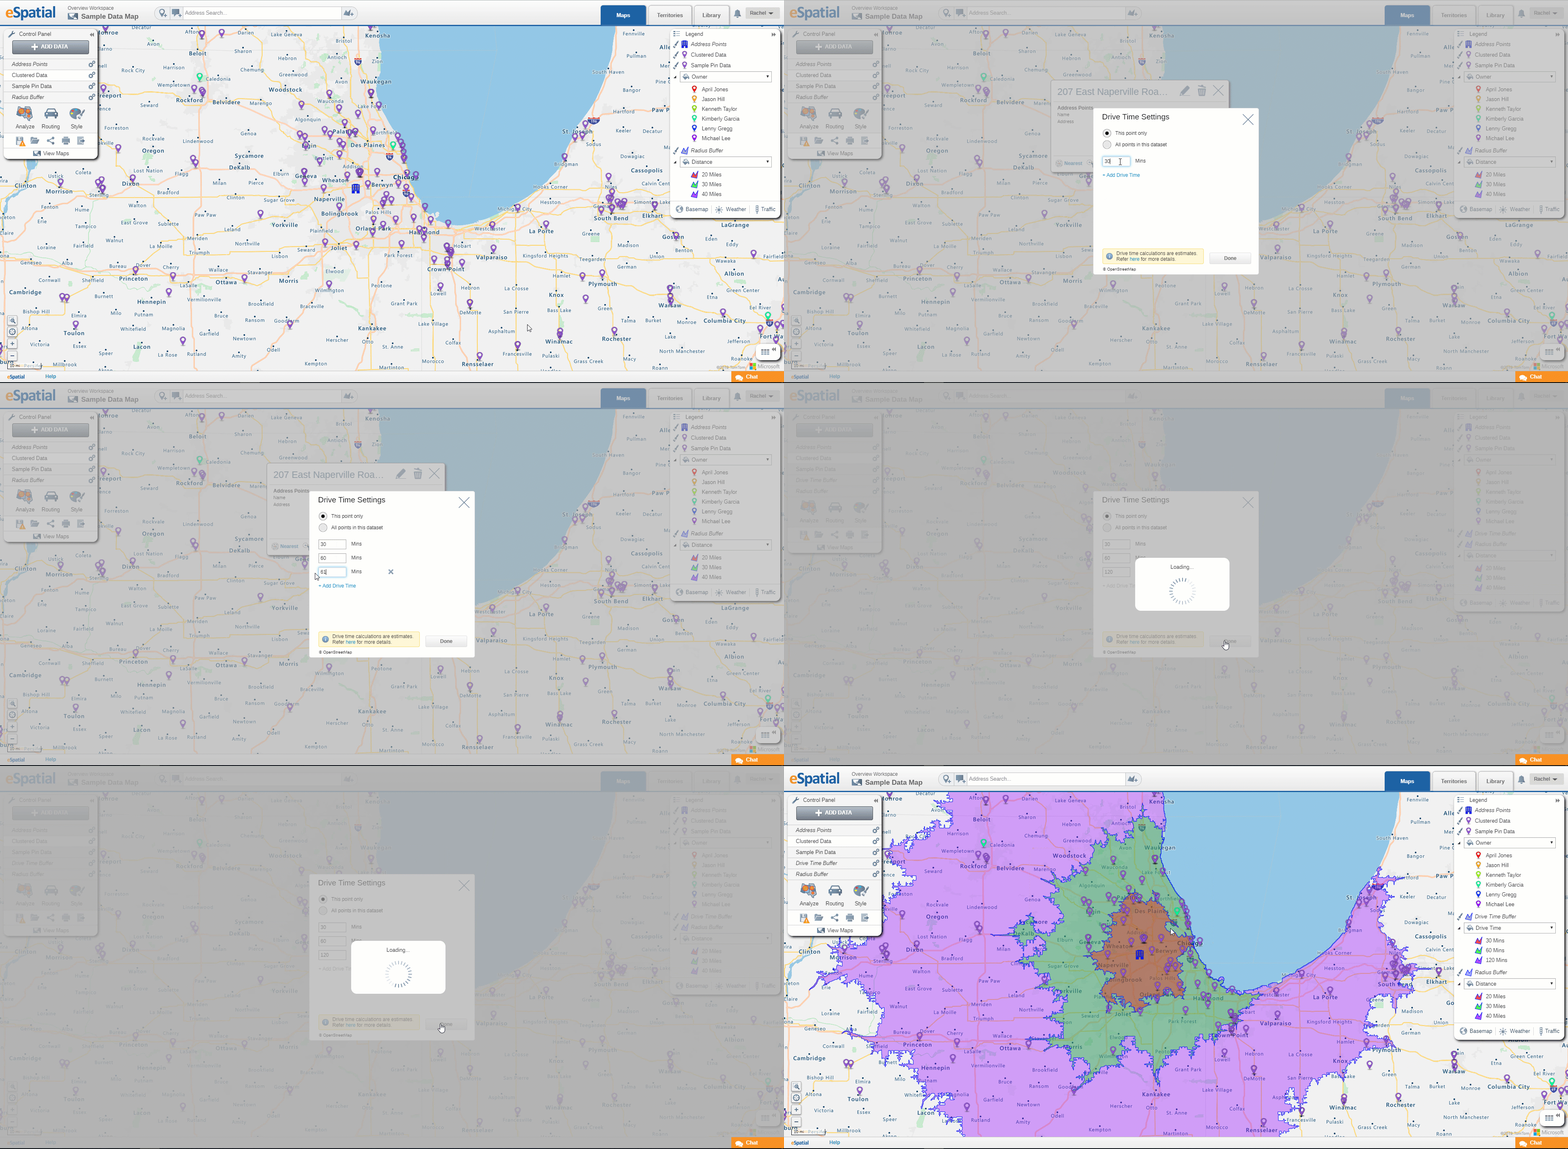
- The drive time window will then appear from here you can select the following:
- Select whether you want to create a drive time buffer from just the select point or all the points in the selected dataset.
- Set your max drive time allowance (you can set to a maximum of 120 minutes)
- You can add up to 3 drive time buffers by selecting add drive time
- Once all chosen drive time distances are inputted select done.
- Your drive time buffers will appear on your map.
Note: Unlike a drive time analysis this does not automatically filter your data to only that within the buffer to filter your data down see Filtering Data from Buffers and Regional Boundaries

For more information about how we calculate drive time values, please see the following article:
