You can use eSpatial Routing Planning to reduce travel costs, improve fuel efficiency, and increase the number of customers you can serve.
Start a new Route:
- Click on the blue Plan Routes button in the top Toolbar
- From the drop-down select Create Route to create a route from scratch. If you want to use the data that you currently have on your map, choose the Create From Current Map option.
- You can also edit your existing Routes from here by selecting the route from the most recent list, or searching for it in the search box.
Add your data to the Map:
- You can either upload a new dataset containing the data you wish to generate your route on, choose an existing dataset that you previously uploaded to create your route, or create your route based on the data that is currently on your map.
Setting your Route Defaults
- After adding your data, click the Settings option in the Routing Window. Here you will be given the option to review and set the following settings for your Schedule.
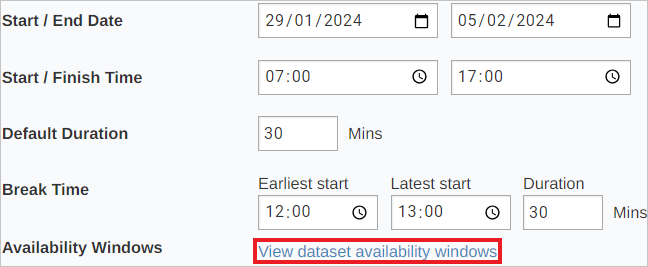
- Start/End Date - the date range for your route
- Start/Finish Time - the time your route will start and finish by each day
- Default Duration – how long each meeting will be
- Break Time – the earliest and latest time a break is likely to start, and the duration of the break
- Availability Windows - If a customer is only available at certain times, you can factor this into your route. You can include this information at time of upload by adding ‘Start’ and ‘End’ column to your dataset denoting the availability windows. You can then set these windows by choosing the ‘Time window start’ and ‘Time window end’ column in this section of the menu.

- Departure Location - the location your route will depart from each day
- Toggle on Round Trip to finish at the Departure Location
- End Location - the location your route will finish each day if it is different from the Departure Location
- Travel Mode – you can choose from three travel modes: car, truck, or walking
- Travel Days - set the days that are available for scheduling stops for your route. For example, if your office day is Friday, then your Travel Days would be Monday, Tuesday, Wednesday, Thursday
- Custom Stop Times - use a field in your dataset to set the specific stop/meeting time for each stop
Naming the Route:
For best practice, we recommend changing the name of your Route to a meaningful name which includes the date the route will start.
- Hover over the Route name in the Top Toolbar and the Pencil icon will appear.
- Click on this to open the Rename Map window.
- Enter the new name and description for your Route.
- Click on the Done button to close the window and return to the Route.
Adding Stops to the Shortlist:
In order to create a Schedule, you first need to add points from the map to the Shortlist. If you wish to filter your data before selecting stops to add to the Shortlist, see this article for more information.
- You can add stops to the Shortlist in the following ways:
-
Use Multi-add to draw an area on the map and select all the points inside that area.
-
Left click on the map to start drawing the area and then double click or use the green check to complete.
-
All points within the area will be added to the Shortlist
-
Click the red x to delete the area
-
-
Recommendations – The Recommendations Index allows you to prioritize which stops are added to the Shortlist based on any values that exist in your data. For example, you can create a Recommendations Index on Potential sales to add only the highest value accounts to the Shortlist.
-
First, set recommendations parameters in the Settings menu.
-
Click on the Recommendations tab and Add Recommendations Index
-
In the Create Recommendations Index Window, Name the Recommendations Index, and choose a dataset and field/fields to base the recommendations on, then click Complete
-
If you add more than one field to be used in the Recommendations Index, assign a Weight to each field. The Weight must add up to 100%.
-
-
Click Done on the Settings Menu
-
Click on the Multi-add dropdown, and choose Recommendations, then Specify the number of stops to be added to the Shortlist based on the active Recommendation Index. Click Add.
-
-
-
In this example, the 80 highest value accounts will be added to the Shortlist
-
-
Add all the points from one dataset to the Shortlist
-
Click on a dataset name in the multi-add drop-down to add all points from that dataset to the Shortlist
-
-
Add all points from all datasets on the map to the Shortlist
-
Click Add All in the multi-add drop-down to add all points from all points datasets to the Shortlist
-
-
Add points individually by clicking on the point on the map, then click Shortlist in the popup window
-
Use an area such as a radius or drivetime buffer, custom area or territory
-
Click on an area on the map, then click Shortlist in the pop-up window
-
All points that intersect with the area will be added to the Shortlist
-
Creating the Schedule
- Once you have added your stops to the Shortlist, select Create Schedule
- To lock stops to a specified time or time window on the Schedule, see this help article
- The stops will be added to the Schedule and the routes and stops for each route will be presented on the map.
- Stops that were not able to be scheduled will remain in the Shortlist.
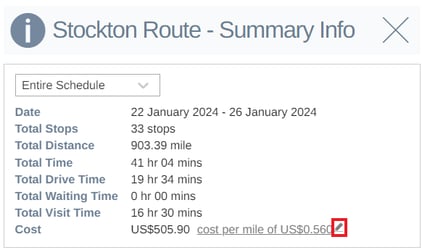
Routing Summary
Once you have generated your route, you can use the Route Summary to calculate the details of your route.
- Click the Hamburger Icon in the top right of your completed Schedule and choose the Summary Info

- The Summary for your entire route will then be displayed in the Summary Info box.
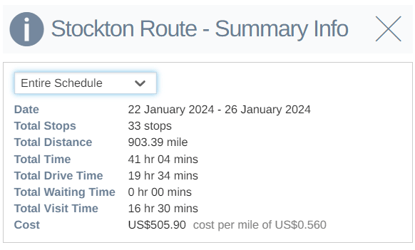
- You can view the day-by-day summary by clicking on the Dropdown menu
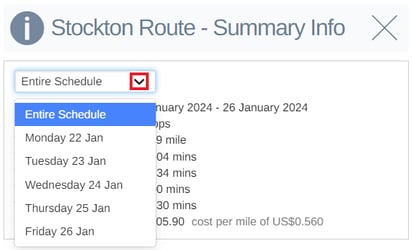
- You can edit the Cost Per Mile value by clicking on the Pencil icon and typing a figure into the box. eSpatial will calculate the cost based on the value you enter.