Lock a stop to a specific time or time range
How to specify a time window for a stop to be scheduled
You can lock a stop to be scheduled at a specific time or between specified times if a meeting is already scheduled or a client is only available during certain time windows.
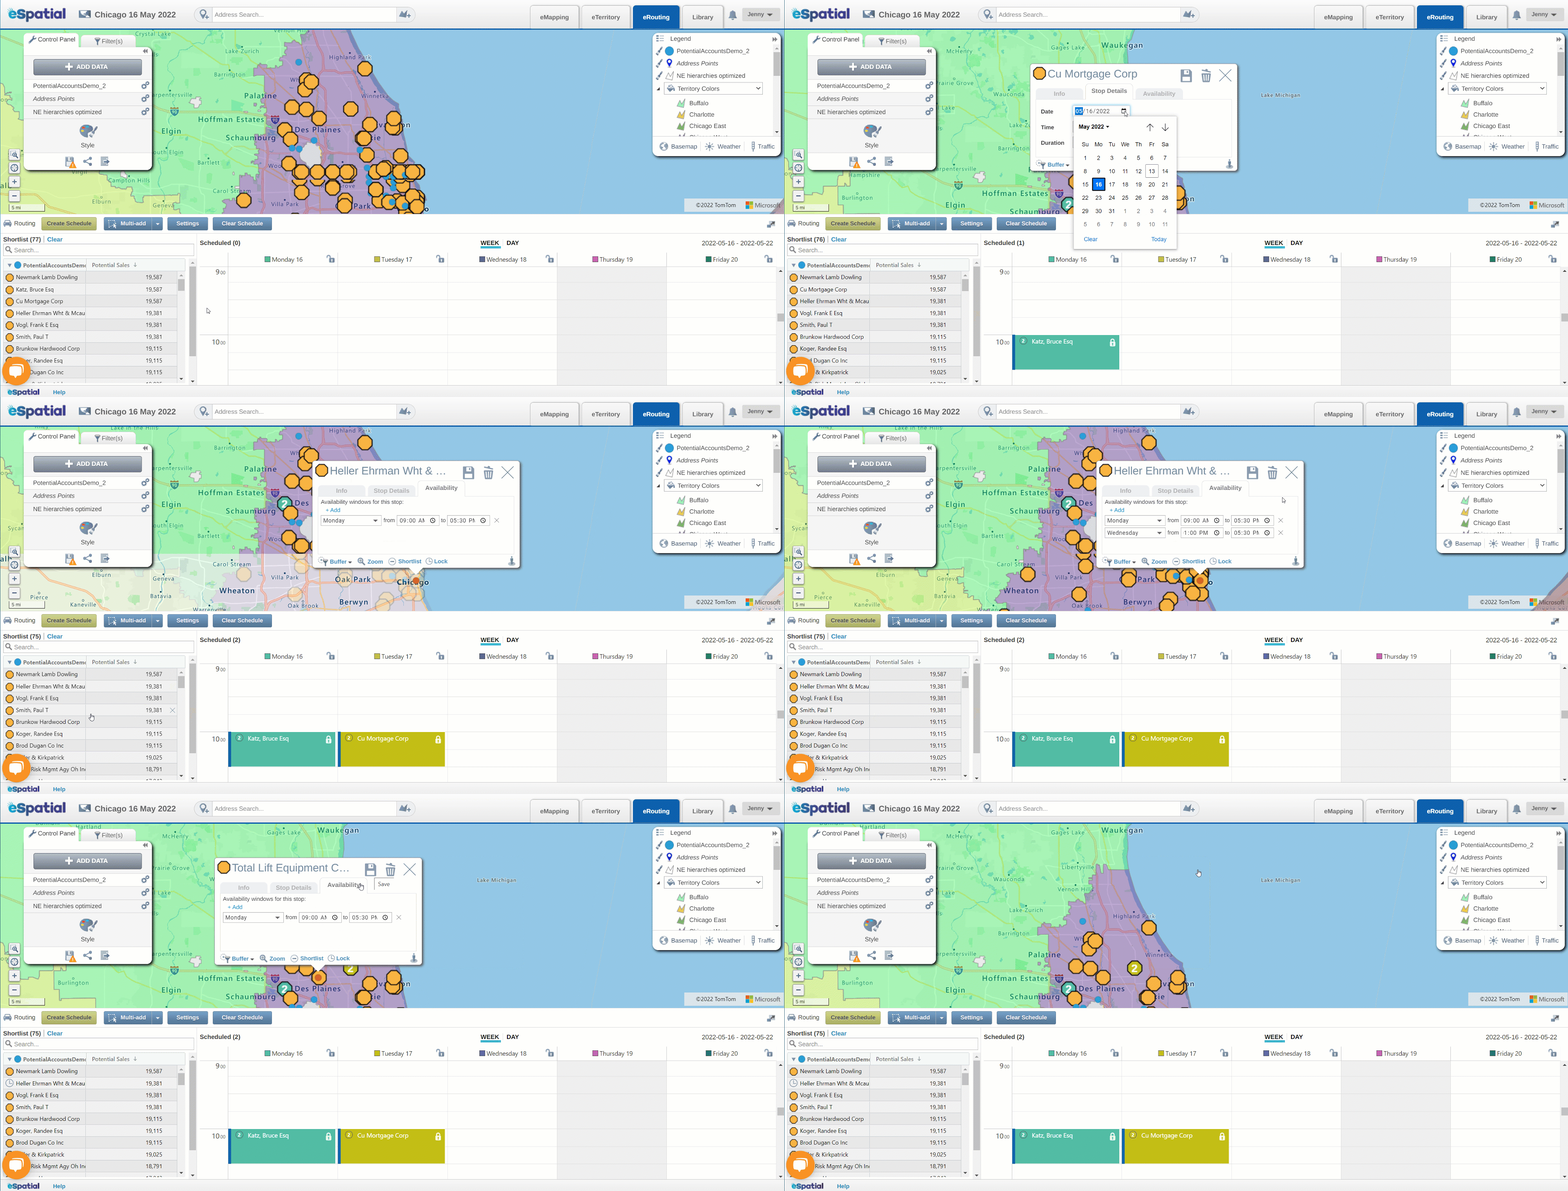
You can lock a stop to a specified time or set the availability for specific points using the following methods:
- From the Shortlist, drag a stop to a specific time on the schedule to lock it to that time
- Click on a stop in the shortlist
- Select Lock this stop
- Set Date, Time and Duration of the stop in the Stop details popup
- Click the Save icon to lock the stop to the specified time on the Schedule
- Select Set Availability to set the days and times this location is available to be scheduled for a visit
- Click the +Add to add additional days and times
- Click the Save icon to lock the stop to the specified time window when scheduling
- Select Lock this stop
- Click on a point the map
- Click on the Availability tab in the pop-up
- Click the pencil to edit the stop
- Set the days and times this location is available to be scheduled for a visit
- Click the +Add to add additional days and times
- Click the Save icon to lock the stop to the specified time window when scheduling
- Click Lock in the bottom of the pop-up
- Set the date, time, and duration of the stop
- Click the Save icon to lock the stop to the specified time when scheduling
- Click on the Availability tab in the pop-up

NOTE: When a stop is locked, it will not be moved or removed if you optimize your schedule again or clear your existing schedule. This behavior also applies if full days are locked.
