Sharing Maps Within Your Team
Sharing maps within your team – individual users or groups.
Users can share their maps with other members of their team so that other members can collaborate on maps. Any maps shared Within Team will appear in the library of the members of the Groups or Users it is shared with.
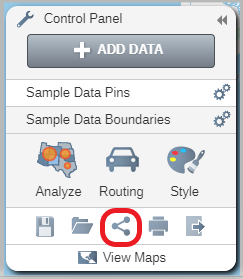
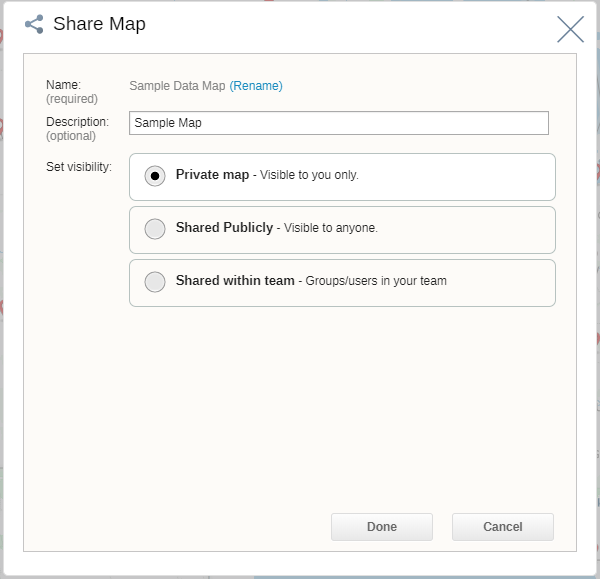
- Click on the Share button to open the Share Map window.

- Click on the Rename link to rename your map for sharing if you choose.
- Click on Shared within Team to set the map to be shared with other users of your account.

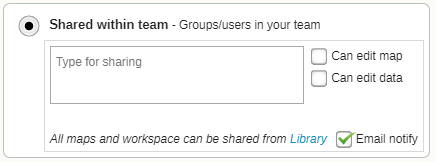
- Start typing the name of the Group or the email of the individual user you want to share with. If you type an email address that is not a user on your eSpatial account, they will automatically be created as one when the map is shared with them.
- Give the group or user the following permissions as needed:
- Can edit map – the group or user can edit the map specified
- Can edit data – the group or user can edit the data on the map specified
- Click on the Email notify check box to send an email to the members of the groups or the users you have shared with. This will notify them that you have shared a map with them and they can find it in their Library.
- Click on the Done button to finish sharing and return your map.

If you are trying to Share via Salesforce, please see this article: Salesforce Sharing & Map Templates
