Map Templates
Map Templates are a great way to create a Map with a number of data-sets (this can be Salesforce data-sets just as leads, accounts, opportunities and non Salesforce data-sets such as state boundaries and corporate sales territories) and then easily roll-out this map definition (including styling) to your team. It can be configured so that your team all see the same data, or better still, when each team member accesses this map, they can see this Map template with their data on the map. So if you have 10 Field Sales Reps on your team, you can create a map template of current pipeline including leads, account, contacts and opportunities and share this out with the 10 team members. When each member opens this template, they have a pre-configured map ready to go just with their pipeline on the map. They have no map setup, they are good to go with their pipeline.
How to create a Map Template
- Create a map as you normal
- As you add Salesforce data-sets, make sure that "Limit to" is set to "My Records". Do this for every Salesforce data-set. This is the key part.
- You can add additional data-sets such as territory boundaries, geographic boundary data sets such as State boundaries.
- You can style the map including labels and map annotations.
- Click the "Save Map" button on the control panel.
How to share a Map Template
Once you've followed the steps on creating a Map Template
- Click on the "Share Map" Icon in the control Panel.
- Click on the "Shared within team" option. (This option is only available if more than just you has accessed eSpatial in your Salesforce Org.)
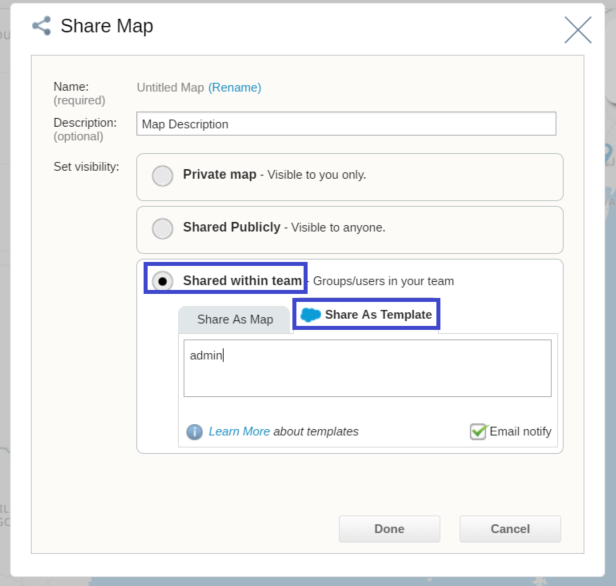
- You can share this map template with individual users by email, or with eSpatial groups. If you share with an eSpatial group, it will share it with all users in your eSpatial account that are in that group.
Where to find Map Templates that have been shared with you
When a map template is share with you, you will be notified by email (assuming the sharer has not deselected the email notify option). You will also be notified of this the next time you access eSpatial in the notifications section (This is the bell top right in eSpatial beside your name).
To access map templates share with you go to your Library
- Click on the Library button in the top toolbar of eSpatial.
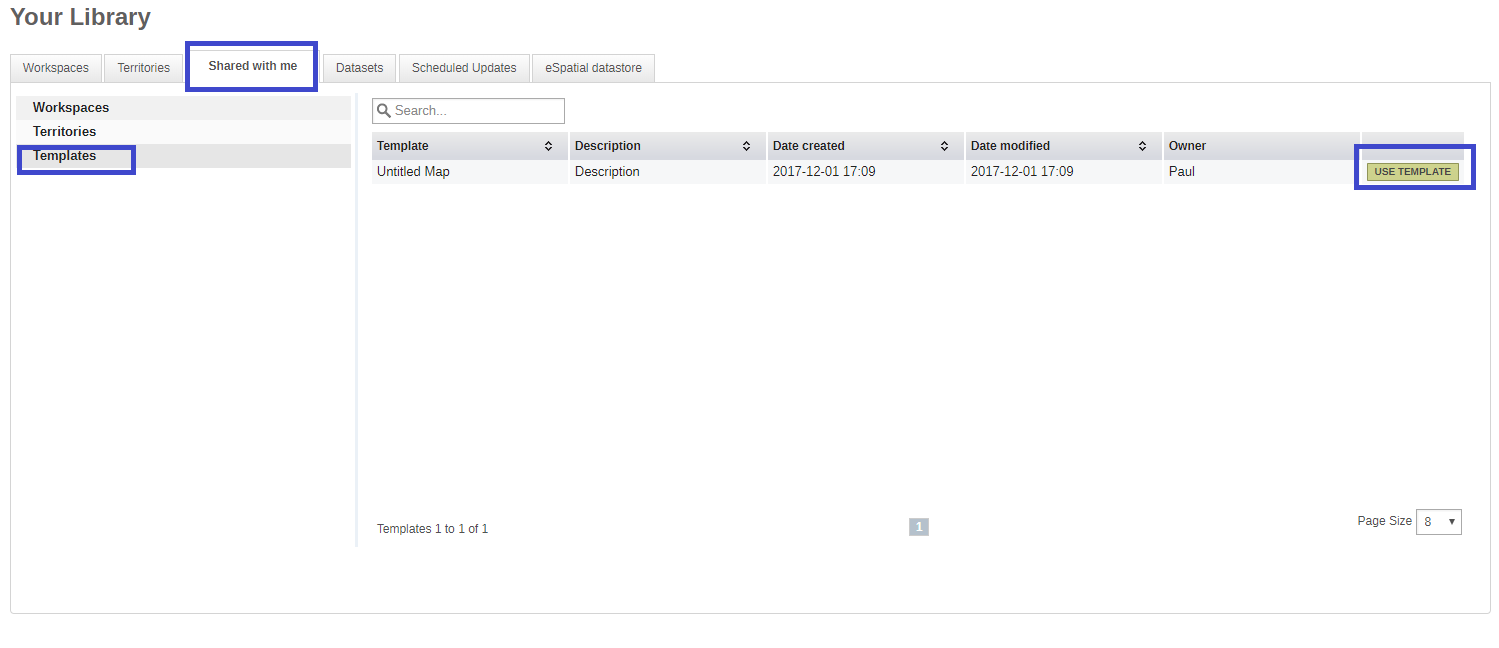
- Click on the "Shared with me" tab.
- Click on templates.
- Templates that have been shared with you will be displayed on the right hand side. Click on the "USE TEMPLATE" button to add this Map Template to a new Workspace.
- You now have two options. You can add the template to a new Workspace or add it to an existing Workspace.
Share As Map
You can share the map as it is. That is, as it currently stands with the data on it. This will not be personalized for the users you share it. They will see the data as you see it on the map. They will not be able to update the Salesforce data on this Map. This can be used for point in time maps, or for reporting where you want to share a map the way you've created it.
Sharing considerations
- You cannot share a Map with an active analysis as a Map Template.
- Once a Map is Shared as a Map Template, you cannot turn an analysis on.
- When you use the "Share As Map" option in shared within team, once there is Salesforce data present, the map will be shared in read-only mode.
How to Share a route template
Once a Route has been created it can be shared as a template in Salesforce.
- Click on the ‘Share Route’ Icon in the control Panel.
- Click on ‘Shared within team’ and choose the ‘Share as Template’ option.
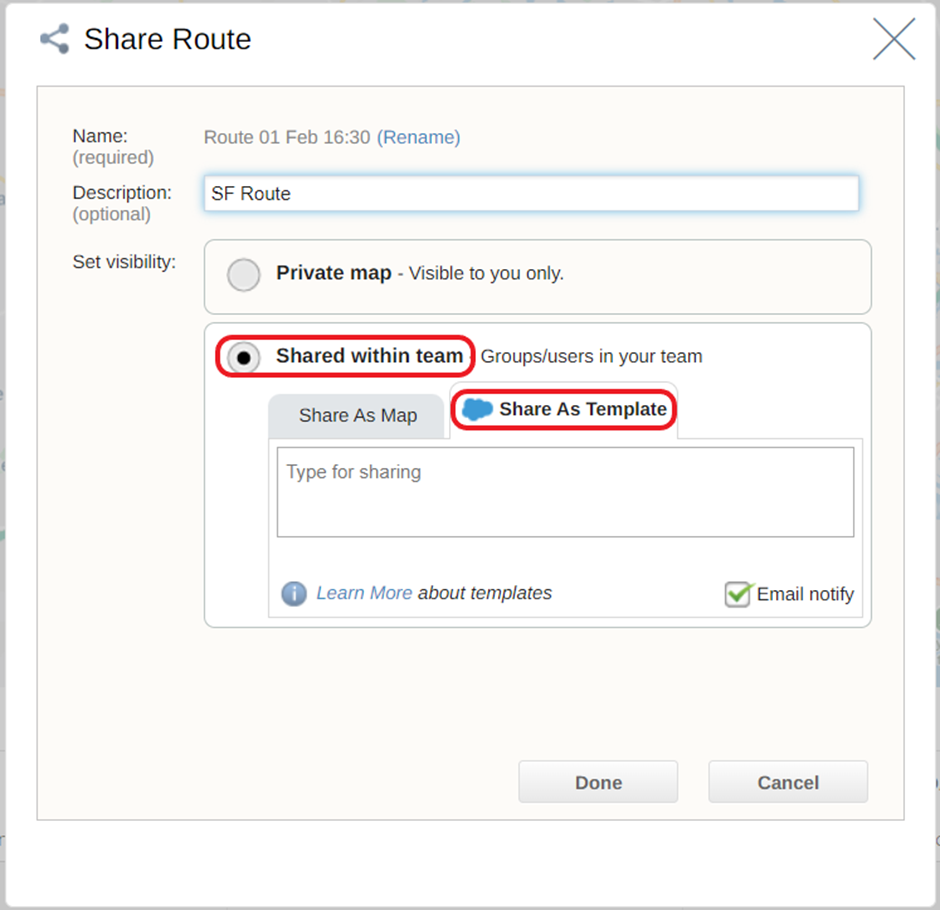
- You can share this map template with individual users by email, or with eSpatial groups.
NOTE: Any route may be shared as a template, whether there is a schedule created or not.
Where to find Route Templates that have been shared with you
To access route templates that have been shared with you:
- Go to your Library in the top toolbar of eSpatial.
- Click on the ‘Shared with me’ tab.
- The shared template displays under Type as ‘Schedule’.
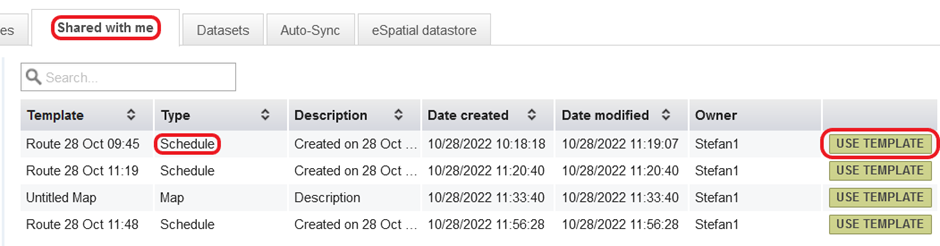
- Click on the ‘Use Template’ button and a new route is created and a sync is started automatically.
NOTE: Settings will be the default settings for a new route map created from a route template.
NOTE: When the creating a new route map from a route template, only the datasets will be created in the new route map. Any schedule data in the original route will be ignored.