Create the Initial Dataset
Before you set a dataset up to be updated using the Upload Tool, you must initially create this dataset within eSpatial. Use a sample of the file you are going to automate from your 3rd party application. This is important so. The file must be in the same format for the automation to be correctly configured. You should import this dataset like you would any other CVS upload. If you need assistance on the initial upload of a dataset, please refer to this section of the help on data preparation and settings - https://help.espatial.com/data-preparing-adding-editing
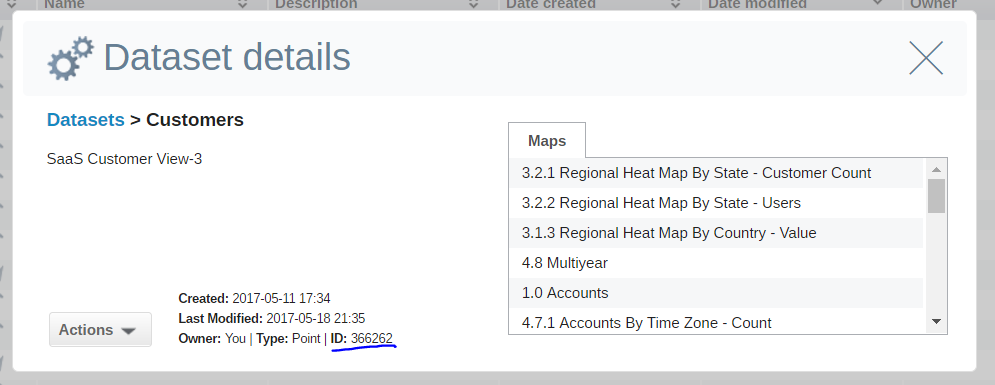
Getting the Dataset details
Once you have successfully uploaded the dataset, go to your library to view the additional details required to setup this dataset. In the library, go to the datasets tab. Click on the cog to the right of the dataset name. You will need to copy the ID from here
Upload Tool Configuration
At this stage you should have already installed the Upload Tool (eSpatial Upload Tool Installation)
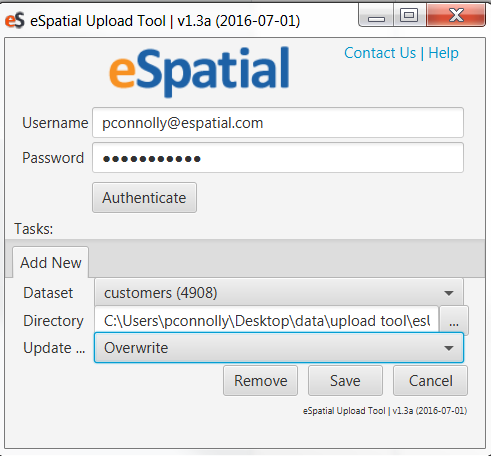
Click on the run-wizard.bat file to open the upload tool wizard. Enter your eSpatial username and password to connect to eSpatial.
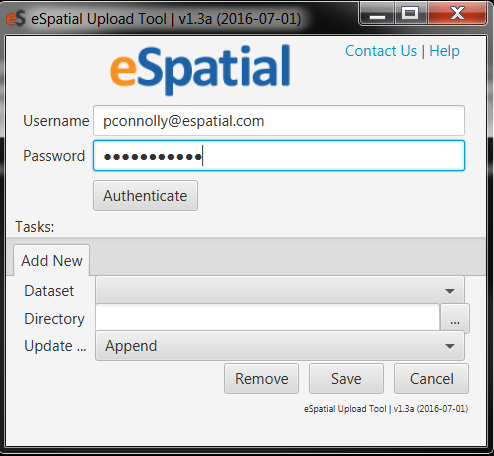
Once you have successfully connected to eSpatial, set the following
- Dataset: Select the dataset in eSpatial that you want to automatically update. This needs to have the exact same structure as the files you are going to use with the Upload Tool.
- Directory: The directory from which eSpatial will import new/updated files to overwrite the dataset in eSpatial. (When you are setting up the export from your CRM/ERP/Database, this is the folder you will export the data to). You must create a separate folder for every dataset you are looking to synchronize.
- Update: There are two options on this drop down. Append will add the data into the file to the existing dataset. If your file only contains new/additional data, you should use this option. If you are exporting your full dataset (e.g. all leads), you should use the Overwrite option. The overwrite option replaces the full contents of the existing dataset with everything that is in the file to be uploaded. Overwrite is the more common option used.
You can configure the Upload Tool to monitor multiple folders if you want to synchronize more than one dataset. You must create a separate folder for each dataset to be synchronized.
Enable the Upload Tool
Once you have configured your dataset or datasets, you need to enable the Upload Tool. To this double click on the run.bat file.
While the Upload Tool is running, every time a new file or updated file is in this folder, the Upload Tool will overwrite/append the dataset in eSpatial.