Merge
By including a unique identifier in your data and indicating that to eSpatial, you can do change-only updates, letting you refresh your data while keeping your routing and territory exceptions in place.
If updating your data using a unique ID, ensure that the column exists in both the file used for updating and the dataset which is being updated, and that the data in both the file and the dataset is unique.
- Go to the library and select the select the Datasets Click on the name of the dataset you want to update to open the Dataset Details window.
- Click the Actions Dropdown and choose the Update Option

- Choose the dataset you wish to use to update the existing dataset with.
- You will then be prompted to choose an Update Mode. Choose the Merge option to update your dataset with a unique field.

- Click on the unique column dropdown and select the Unique ID column that is present in both your existing dataset and the file being used to update it.

- Once the Unique ID field has been chosen, click complete to update your dataset.
NOTE: If a unique column is not specified, data will be entirely overwritten by the new file.
Append
Once you have uploaded data to eSpatial you may wish to add more data to that dataset. Appending is suitable when you are adding new data that isn’t already on the datasheet. If the dataset that you are using to append to your existing dataset contains all of the existing data plus new records then you should our overwrite option.
⚠️ Warning: Do not use this method to update balancing datasets related to territory alignments or routes. Doing so may result in the loss of stop assignments and misaligned routes or territories.
- Go to the library and select the select the Datasets Click on the name of the dataset you want to update to open the Dataset Details window.
- Click the Actions Dropdown and choose the Update Option

- Choose the dataset you wish to use to append with.
- You will then be prompted to choose an Update Mode. Choose the Append option.

- Click Complete click complete to update your dataset.
- Click on the Return to Dataset button to go back to your dataset in the Library.
Overwriting Data
Once you have uploaded data to eSpatial you may wish to edit that dataset to contain more up to date records. If the dataset contains records that are already uploaded to eSpatial we recommend updating the dataset using the overwrite function.
⚠️ Warning: Do not use this method to update balancing datasets related to territory alignments or routes. Doing so may result in the loss of stop assignments and misaligned routes or territories.
- Go to the library and select the select the Datasets Click on the name of the dataset you want to update to open the Dataset Details window.
- Click the Actions Dropdown and choose the Update Option

- Choose the dataset you wish to use to overwrite with.
- You will then be prompted to choose an Update Mode. Choose the Overwrite

- Click Complete to update your dataset.
- Click on the Return to Dataset button to go back to your dataset in the Library.
Adding Additional columns
You can add extra settings to a dataset to help eSpatial identify primary phone numbers, email addresses, and other settings. This can be done through accessing the Dataset Details.
- In the control panel, click the cog icon beside the relevant dataset and then click on the Dataset Details. This will open the Dataset Details window in your library.

- All Maps, Routes & Territories containing this dataset are listed on the left-hand side and are clickable.
- There are options to add a new field, add a special function to a field and remove any field except Address Fields & default label columns.
- There are also options to Update, Share or Delete the dataset in the Actions
Adding Fields
From the dataset details window in the library you can add a field to your dataset.
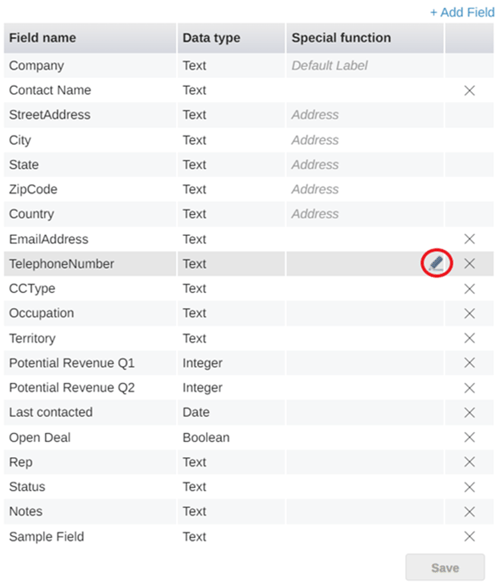
- Click on the +Add Field button. A blank field box will appear at the bottom of the list of fields.
- Type the name of the new field into the box and click the drop down to select the data type you want the new field to be. Click Save to add the field to your dataset.

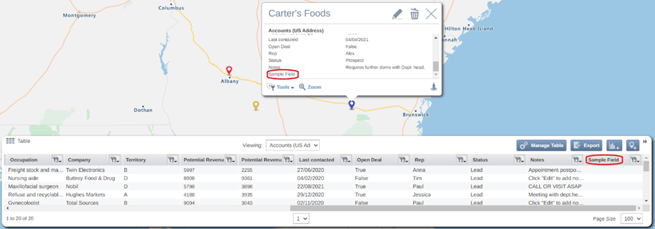
Once saved you will get a confirmation message letting you know that the field have been added to your dataset.
The newly added field will now be present in both the point pop up and the Data table.
Adding Special Functions
- Hover over the special function text area next to your field of choice and click the edit pencil.
- Click the drop down and select the special function that you wish to assign to this field. Select the option you want and click save.

- The special function that you set will now appear in the list.
