SSO Configuration: eSpatial & Okta
Integrate eSpatial with Okta
You can find out more about eSpatial and SSO here . In this article we look at the configuration details to setup SSO between eSpatial and the SAML 2.0. compliant Okta (https://www.okta.com/ )
Enable SSO on your Account
You need to have an eSpatial Enterprise account.
- Click on your username drop down in the top right corner.
- Select Manager Groups & Users.
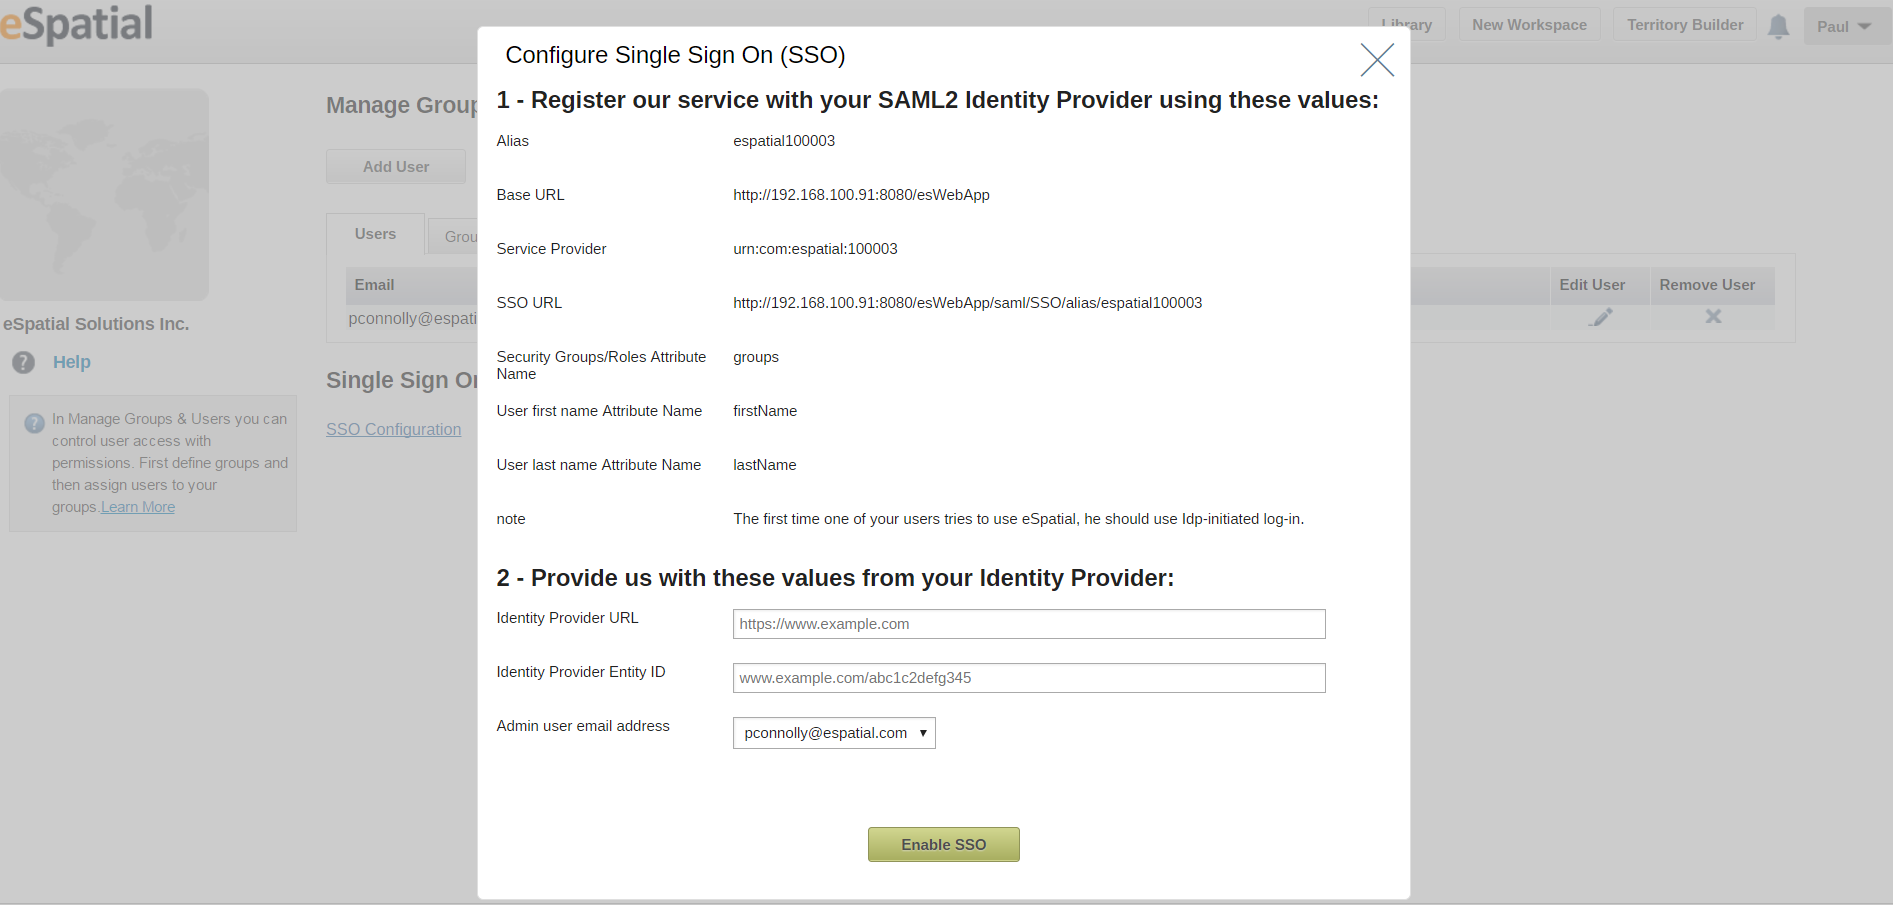
- Click on the SSO Configuration Link.

Initial Okta Setup
You need to have an Okta SSO subscription. You need to have your Okta instance successfully configured and ready to add applications.
Within your corporate Okta account:
- Select the admin button
- Select add applications
- Select create new app
- Select Web
- Select SAML 2.0
- Give the application the name eSpatial
- Upload the eSpatial logo
- Click on next
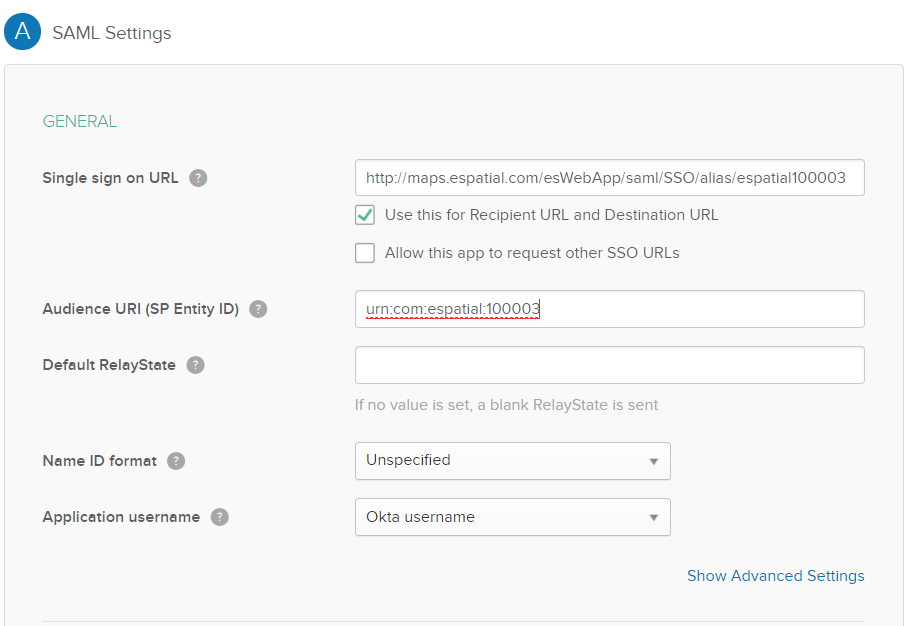
- Copy the SSO URL from eSpatial to Okta SSO URL
- Copy service provider from eSpatial to Okta Audience URI

- In GROUP ATTRIBUTE STATEMENTS (OPTIONAL), enter “groups”
- Select next
- Select I’m an Okta customer
- This is an internal app
- Click Finished
Further eSpatial settings
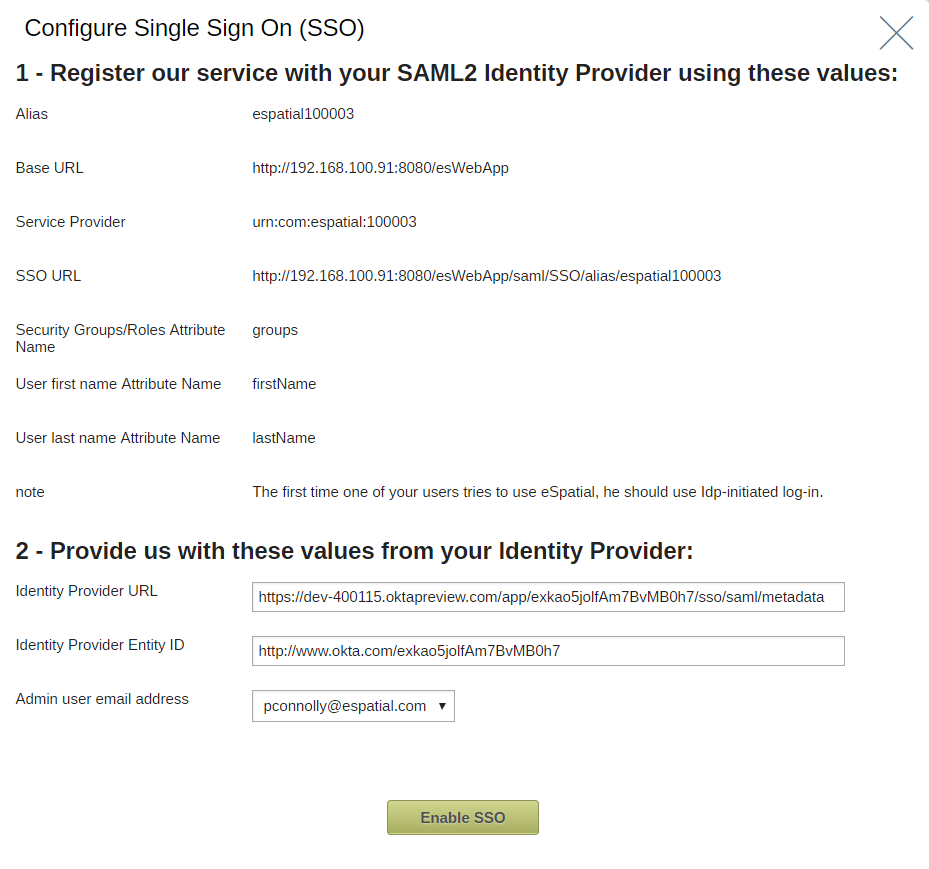
- Right click on Identity Provider metadata in Okta and copy link address (ensure includes metadata at the end) and copy to eSpatial Identity Provider URL
- Select Okta “View Setup Instructions” Button and copy “Identity Provider Issuer:” URL to eSpatial Identity Provider Entity ID

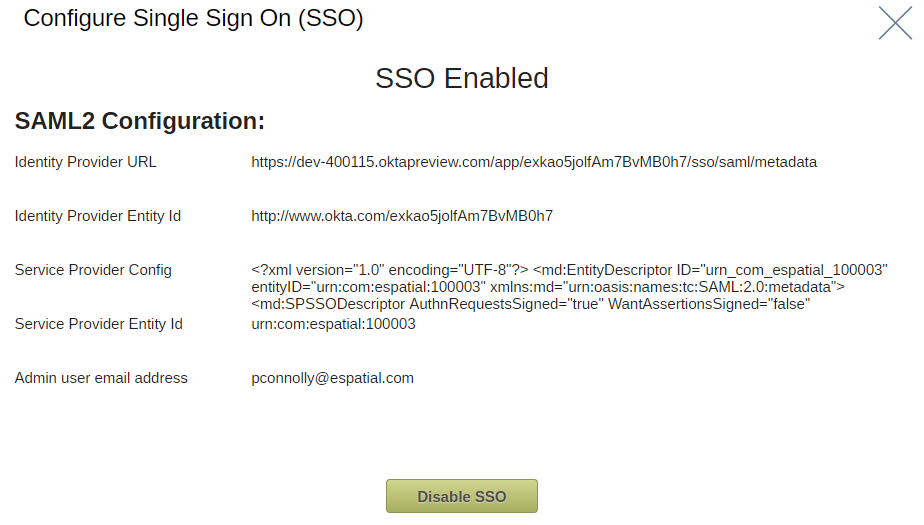
- Click enable SSO

- Log out of eSpatial
Additional Okta Steps
- In Okta, go to Applications tab, select eSpatial, and click on People Tab
- Assign users to the application
Additional eSpatial
- Login as the eSpatial superuser
- Grant SSO GROUP the default settings you would like every user to have.
User Login
- Get users to login through your Okta portal. The URL will be similar to the following - https://<our_url>.oktapreview.com/app/UserHome
- They can click on the eSpatial link here assuming you have given them access to the application.
