You can find out more about eSpatial and SSO here . In this article we look at the configuration details to setup SSO between eSpatial and the SAML 2.0. compliant Microsoft Azure.
Enable SSO on your Account
You need to have an eSpatial Enterprise account.
- Click on your username drop down in the top right corner.
- Select Manager Groups & Users.
- Click on the SSO Configuration Link.

Microsoft Azure Configuration
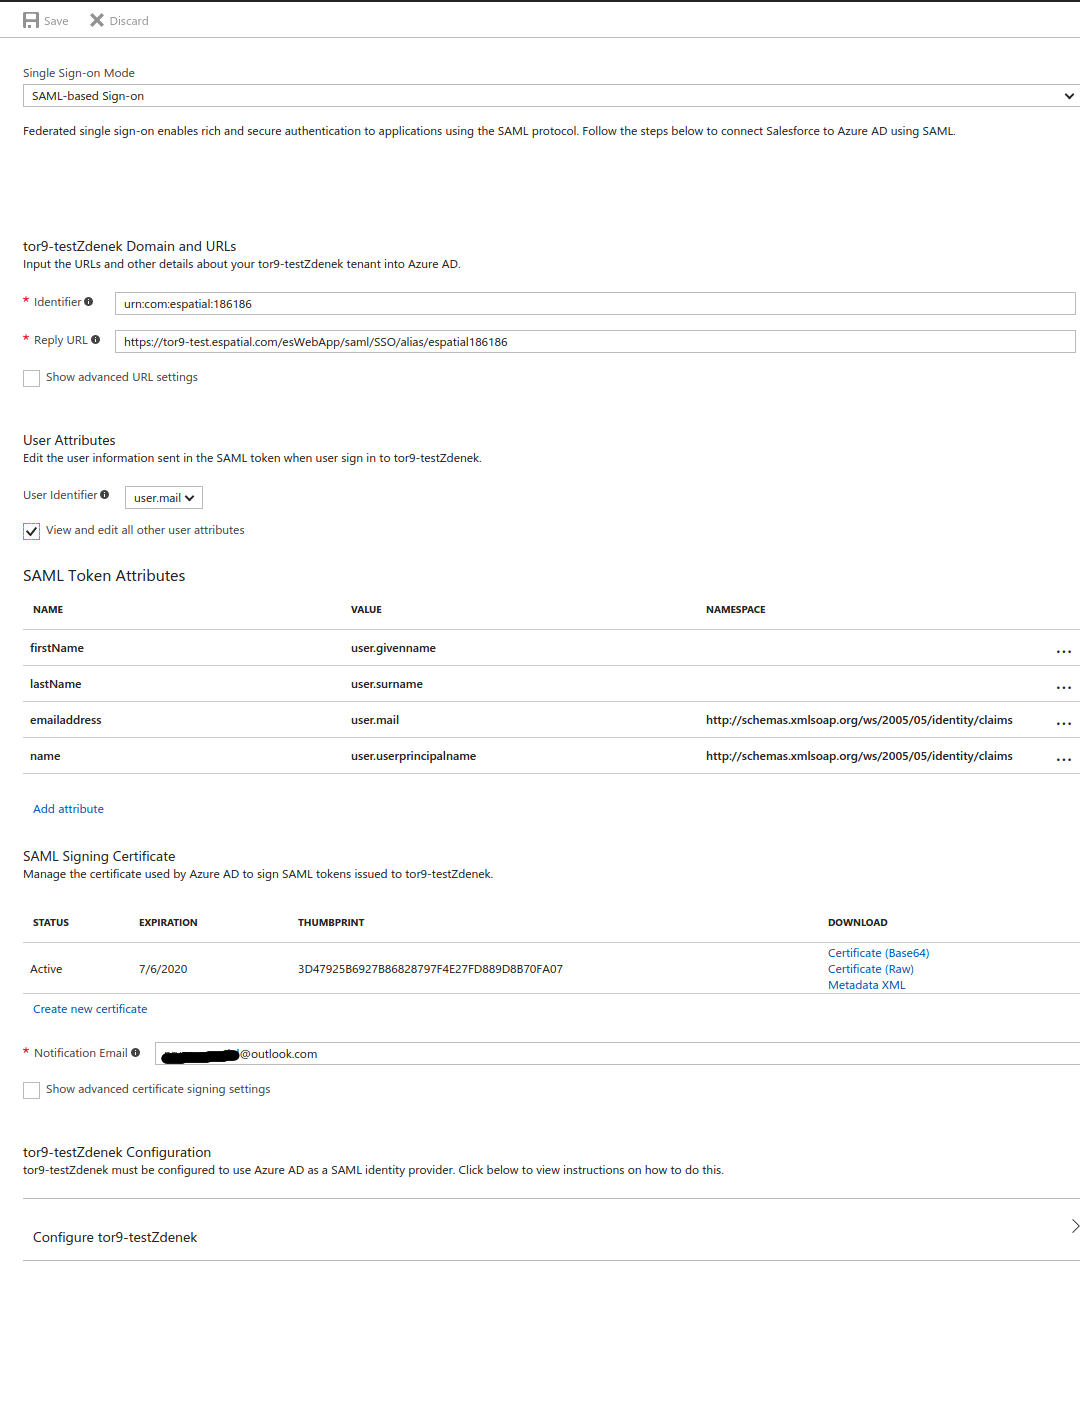
- Add eSpatial as a new Azure AD application
- select SAML-based Sign-on in the dropdown
- Open the eSpatial Configure Single Sign On page
- Copy the value of Service Provider Entity Id to Azure form Identifier field e.g. urn:com:espatial:186186
- Copy the value of ACS SSO URL to Azure from Reply URL field e.g. https://maps.espatial.com/esWebApp/saml/SSO/alias/espatial186186
- You can use Service Provider Metadata as XML file to upload to Azure if this option is available (save text to XML and upload to Azure).
- Set to User Identifier user.mail
- Check the View and edit all other user attributes checkbox
- Edit givenname and remove the namespace and change the givenname to firstName
- Edit lastNamesame and remove the namespace
- Download the Metadata XML file. Email this file and the Identity Provider Metadata URL (if available) to eSpatial (help@espatial.com) to validate the configuration
- Select the Save button on top.
eSpatial Configuration
- On receipt of your XML Metadata file and URL we will validate the configuration.
- We will send you confirmation once this has been successfully validated and configured on the our side.
- Once you receive confirmation, you can complete section 2 on the SSO configuration screen in eSpatial.
- You can either use your IDP URL or upload your metadata file in section 2 on the configuration page in eSpatial. (The URL option is the preferred option).
- Uncheck the Manage security groups checkbox
- Enable SSO
Adding new users to eSpatial through Azure
- Now that you have successfully connected eSpatial and your Azure instance, you are ready to start giving individual users access to eSpatial using Azure.
- From Azure, grant the users access to eSpatial.
Login to eSpatial
- For the first login, the user must log into eSpatial from Azure or myapps.microsoft.com . (This will create the user on eSpatial).
- For subsequent logins, they can access eSpatial from your Azure login or directly from the eSpatial Login page.