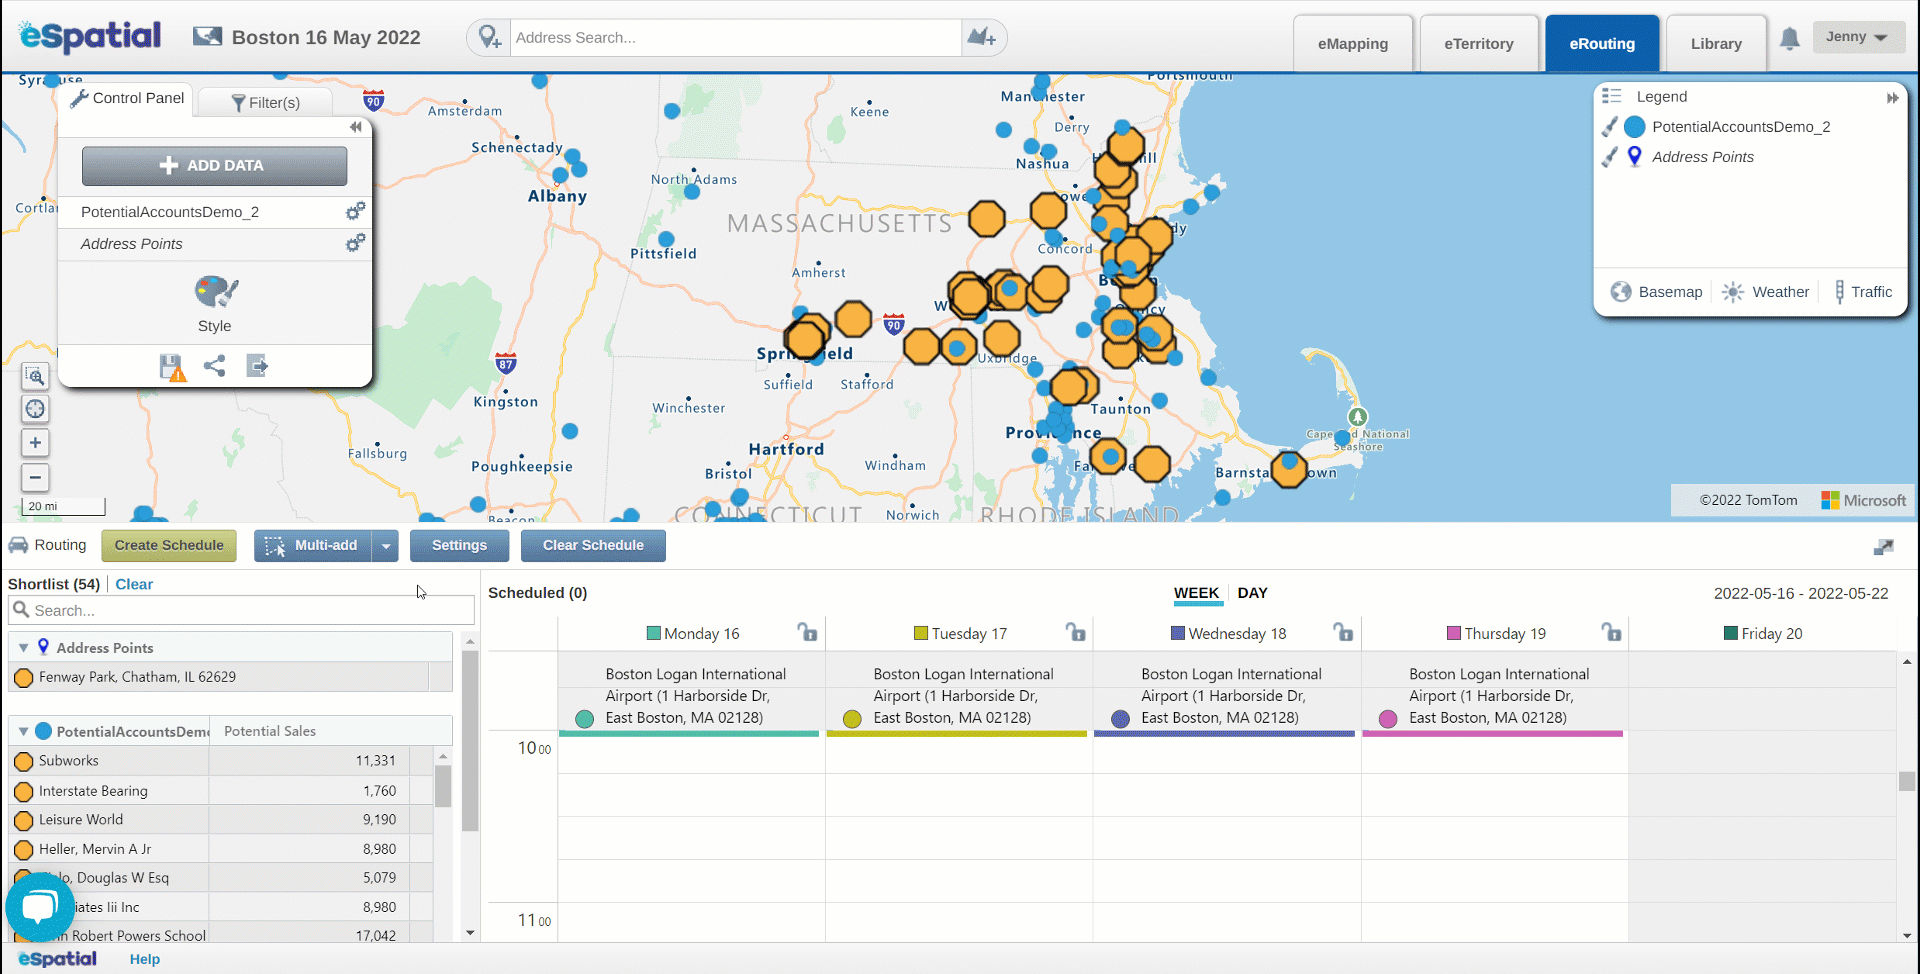
To access and make adjustments to your route settings, click on the Settings button on the Routing window
Route Defaults
The Settings window will open with the Route defaults tab selected.
Set the following Route defaults here:
-
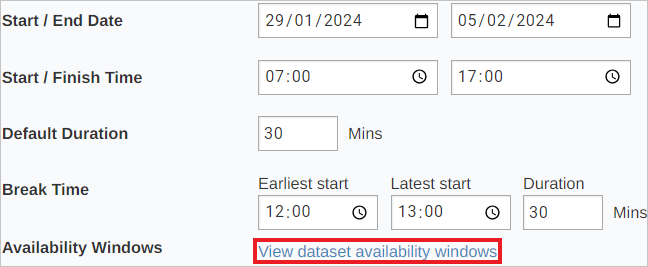
Start/End Date – the date range for your route
-
Start/Finish Time – the time your route will start and finish by each day
-
Default Duration - how long each meeting will be
- Break Time – the earliest and latest time a break is likely to start, and the duration of the break
- Availability Windows - If a customer is only available between certain times, you can factor this into your route. You can include this information at time of upload by adding ‘Start’ and ‘End’ column to your dataset denoting the availability windows. You can then set these windows by choosing the ‘Start’ and ‘End’ column in this section of the menu.

-
Departure Location – the location your route will depart each day
-
Toggle on Round Trip to finish at the Departure Location
-
-
End Location – the location your route will finish each day if it is different from the Departure Location
-
Travel Mode –you can choose from three travel modes: car, truck, or walking
-
Travel Days – set the days that are available for scheduling stops for your route. For example, if your office day is Friday, then your Travel Days would be Monday, Tuesday, Wednesday, Thursday
-
Custom Stop times – use a field in your dataset to set the stop time for each location

Saved locations
Click on the Saved locations tab to store locations to be used in your route such as home office or rep address
-
Click +Add New to create a new Saved location
-
Click +Add Current Location to add your current location as a saved location
-
Saved locations can be added to the Shortlist by clicking Add to Shortlist

Recommendations
- Click on the Recommendations tab to add a Recommendations Index to prioritize which stops are added to the Shortlist based on any values that exist in your data. For example, you can create a Recommendations Index on Potential sales to add only the highest value accounts to the Shortlist.
- Click +Add Recommendation Index to add an index
- Name your Recommendations Index
- Select the dataset to be used in creating the index
- Select the Field, Assign a Weight, and Priority order
- If using multiple fields for the Recommendations Index, ensure the Weight adds up to 100%
- Click Complete