Make sure that your report has location information
For your data to be plotted on map, it must have some location data. This can be an address, coordinates or even location information to link to.
Create an eSpatial folder in Salesforce.com
As you create your reports in Salesforce.com, create them in an eSpatial folder so that they are easy to find when you look to add them from eSpatial.
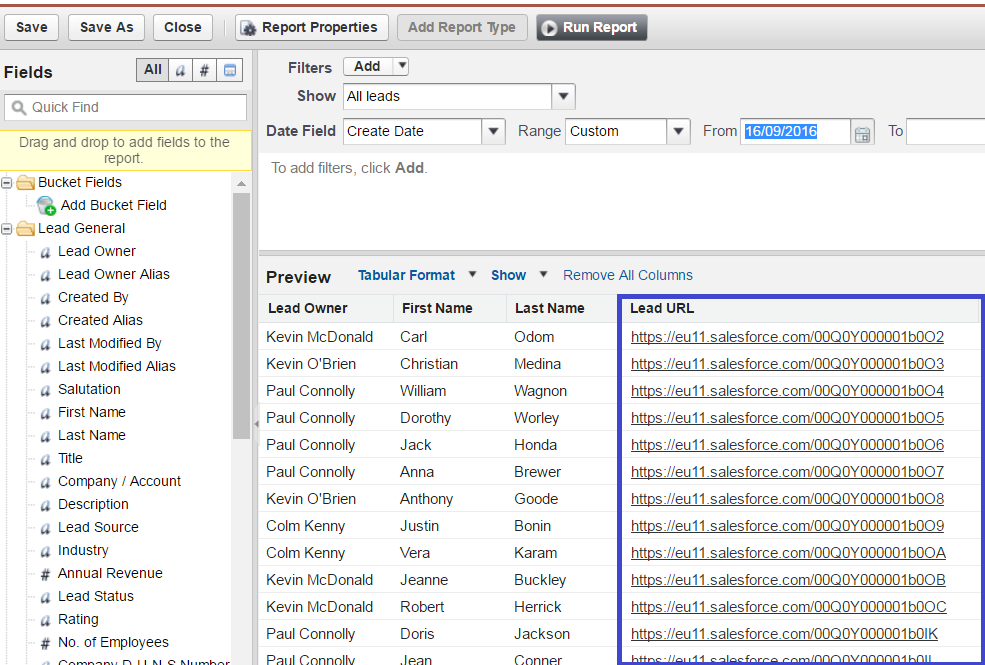
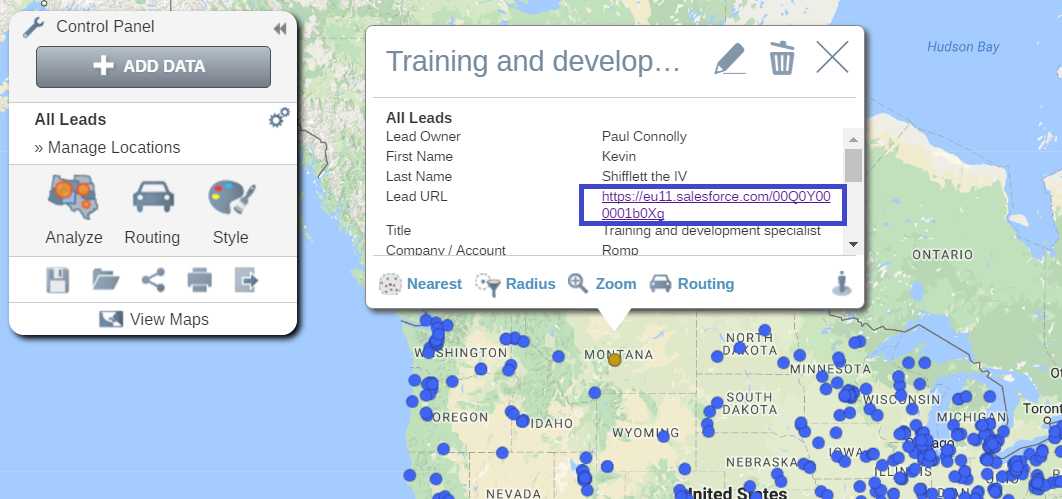
Include a link in your report to your salesforce records
By default, Salesforce reports do not include a link back to the original record. By including a link or multiple links (if the report includes more than one Salesforce object) can really help with how you can work with both eSpatial and Salesforce.com. By including a link, you can click on any point in an eSpatial map and go directly to the record in Salesforce.com.
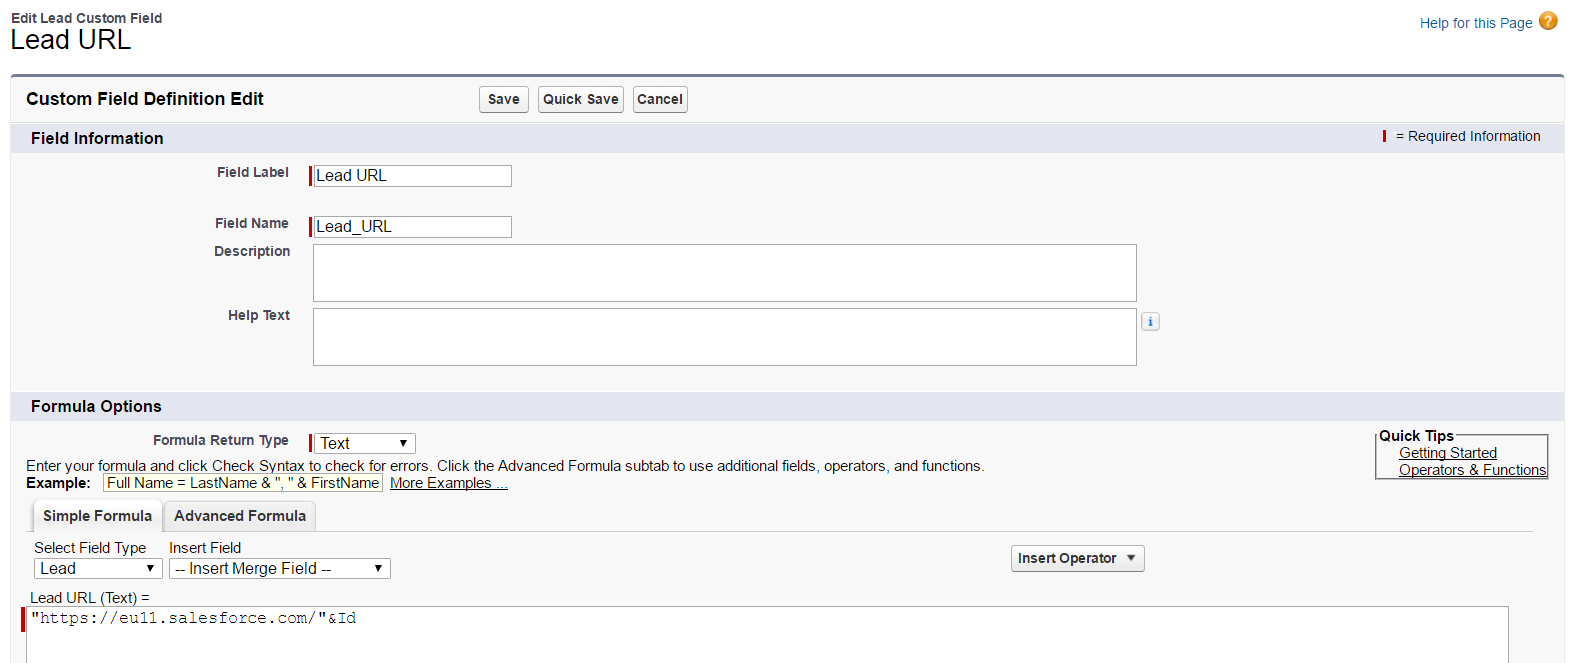
Here are the steps to add a URL type to your Salesforce.com object:- You will require Salesforce.com administration permissions. If you do not have these you may need your Salesforce.com administrator to set this up for you.
- In Salesforce.com, go to Setup, Build, Customize, Leads, Fields.
- In the “Lead Custom Fields & Relationships”, click on “New”.
- Enter your Salesforce.com instance URL and add the id parameter. In the following screenshot I am adding the lead id to create a URL to a lead.
Save this new field and it will then become available to your reports. In the following two screens you can see how this URL is now available to my report in Salesforce.com and then how the URL is available within the information popup in eSpatial.