Manage Columns
Edit columns added to eSpatial and its column type
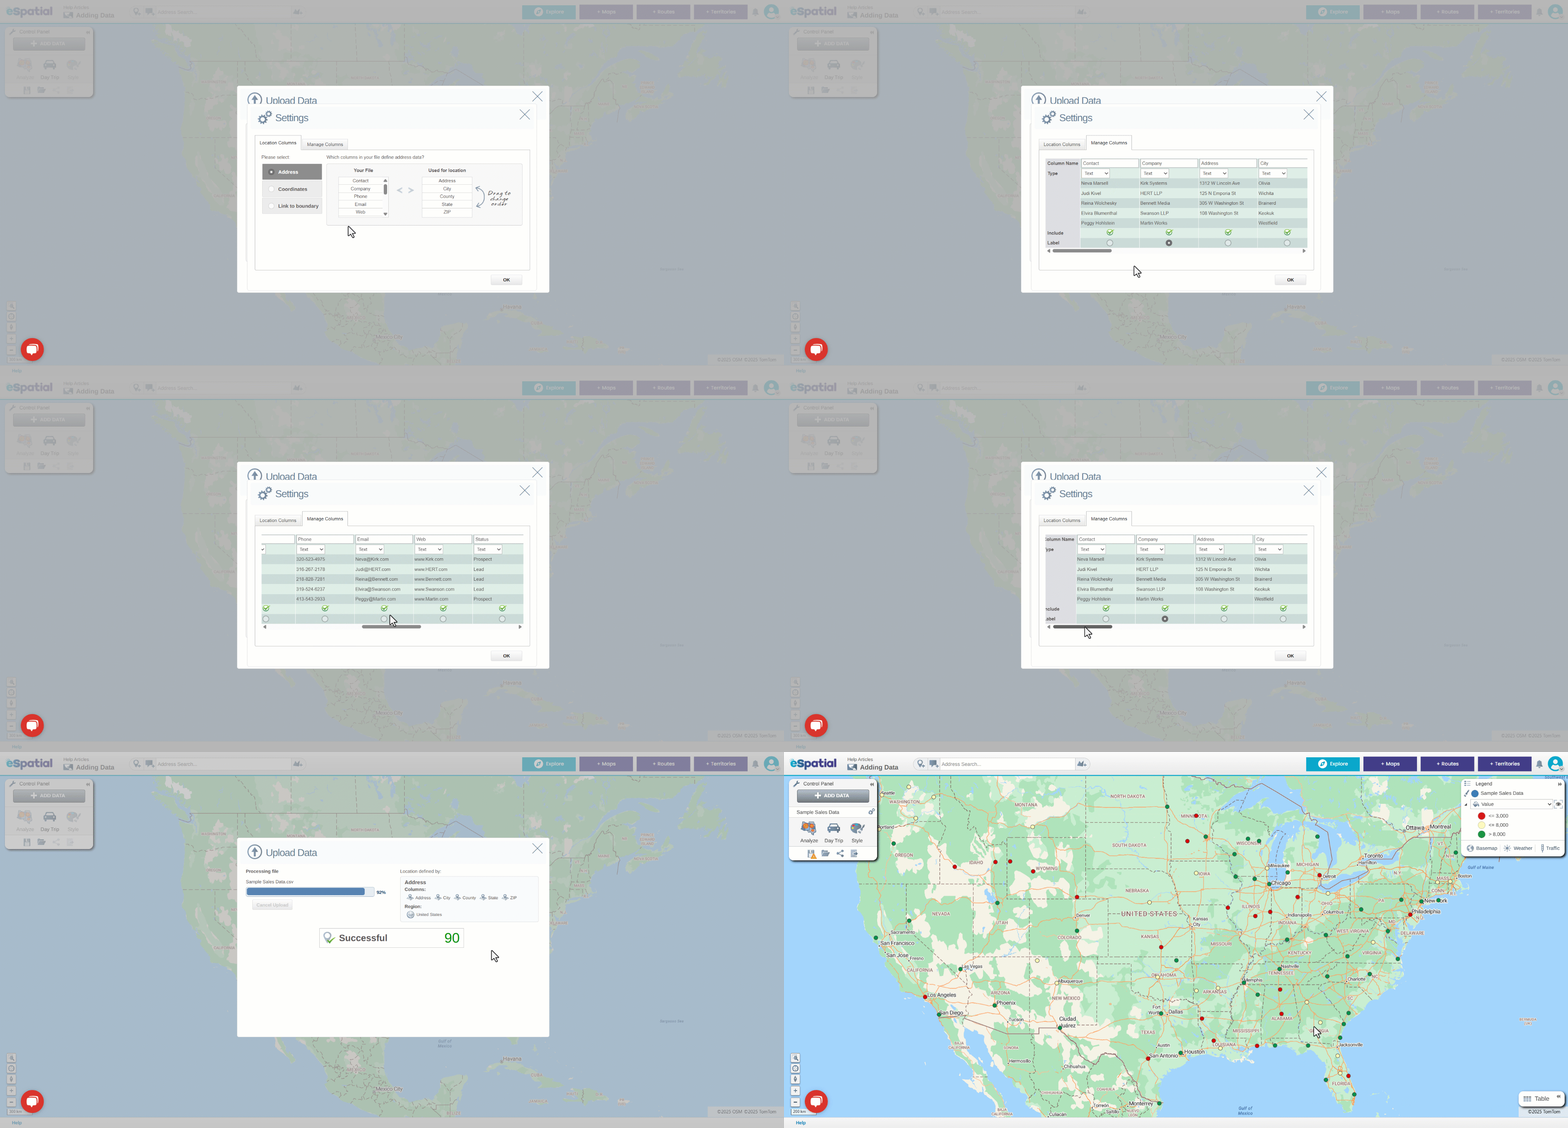
- Select the Add Data button in the Control Panel. This will open the Add Data window. Select Upload File and navigate to your dataset.
- To edit the columns added to eSpatial, select Change Settings in the bottom right corner.

- The change setting window will default to the location columns tab, select the manage columns tab to edit the columns in your data being uploaded.
- You can remove columns from the dataset being uploaded by deselecting the tick icon under the column
- Users can also select the column type from the dropdown:
- Text
- Integer
- Decimal
- Boolean
- Date
- Users can also select which column will be used as the default label on their map upon upload.
- Once complete click on the OK button.

