- Adding data to your map can be done in two ways:
- You will automatically be prompted with the Add Data window when you create a new map that does not already have data present.
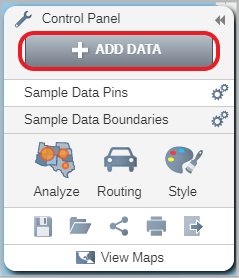
- Click on the Add Data button in the Control Panel.
- This will open the Add Data window. Click on the Upload File button.
- Select the csv file you want to add.
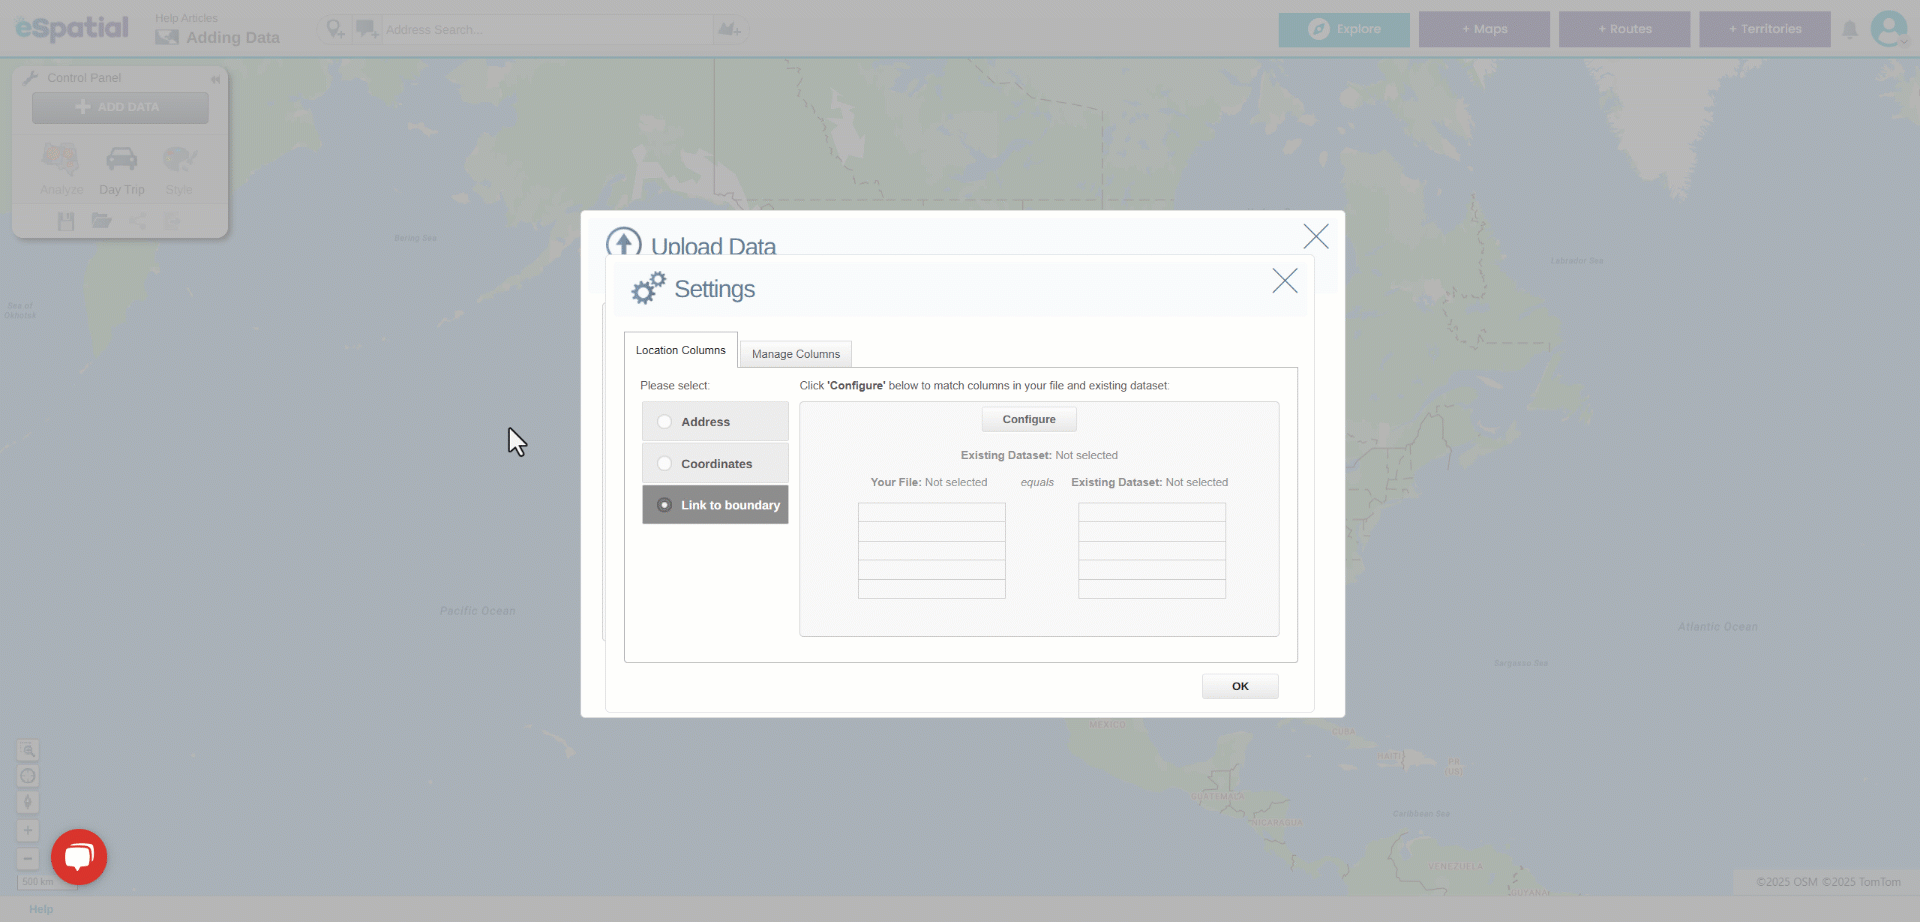
- Click on the Change Settings button to open the Settings window.
- Select the Link to Boundary option.

- Click on the Configure button to open the window below.
- If the dataset you are linking to is one you have already uploaded or that you have already added to your account from the eSpatial datastore then select the Datasets tab. If the dataset has not yet been added to your account then select the eSpatial Datastore tab.
- Click on the Select button next to the dataset that you want to add to your account.
- Select the column in your data and the column in the existing dataset that match and click the Ok button.
- The Settings window will open. Click on the OK button to accept the settings. eSpatial will link the fields in your data with those in the existing dataset.
- Click on the Complete button. The Upload Data window will open. You can see the progress of your upload and how your data was plotted.
- Click on the Return to Map button to see your data plotted on a map.