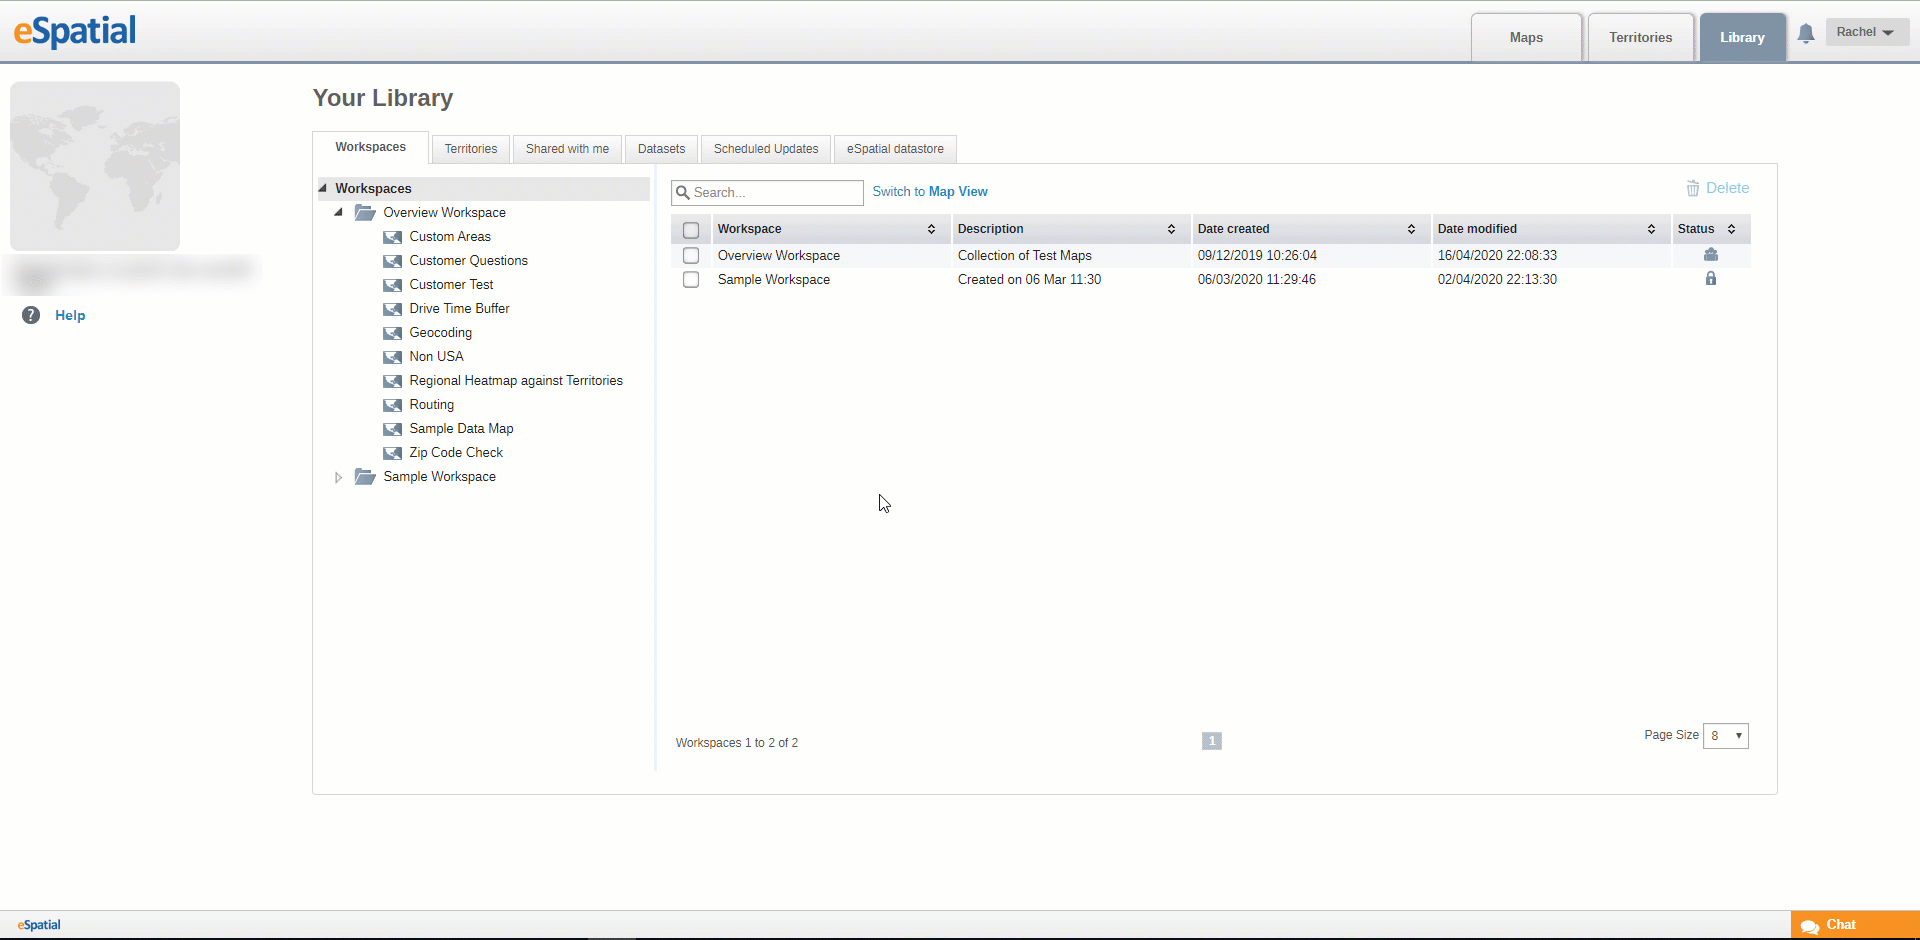
- Search for a workspace or a map by typing in the Search box. Any workspaces or maps that match your criteria will be returned.
- Click on the Switch to Map View /Switch to Workspace View link to toggle between Map View and Workspace View.
- Click on a Workspace name in the Workspace tree or in the main window to see any Maps saved in that Workspace.

- Click on a Map name to open it.
- Click on the Pencil icon beside the Workspace name to rename the Workspace
- Click on the Delete icon to delete the Workspace.
- Click on the Share icon to share the workspace.
- Enter the name of a group or individual email with whom you want to share the workspace.
- Give the group or user the following permissions as needed:
-
- Edit Maps – the group or user can edit the map.
- Edit Data – the group or user can edit the data on the map.
- Create Maps – the group or user can create new maps in the shared workspace.
- Click on the Email notify check box if you would like to send an email to the user.
- Click on the Done button to finish sharing.
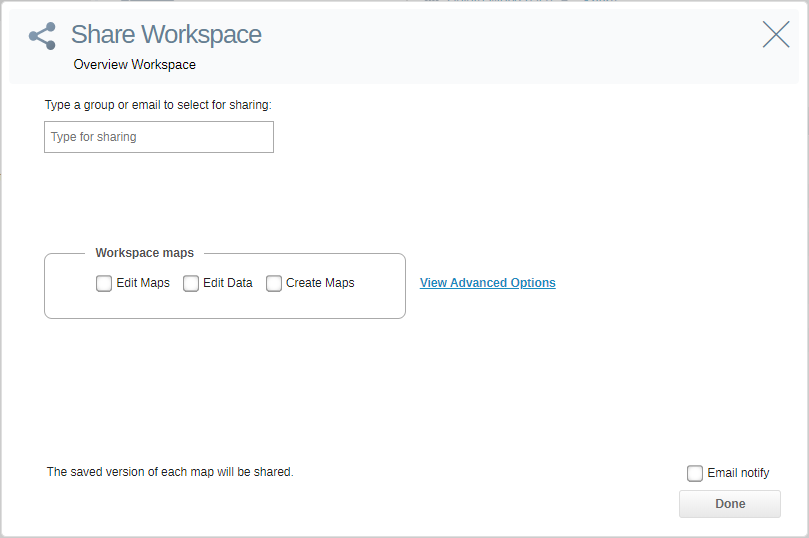
Advanced Options
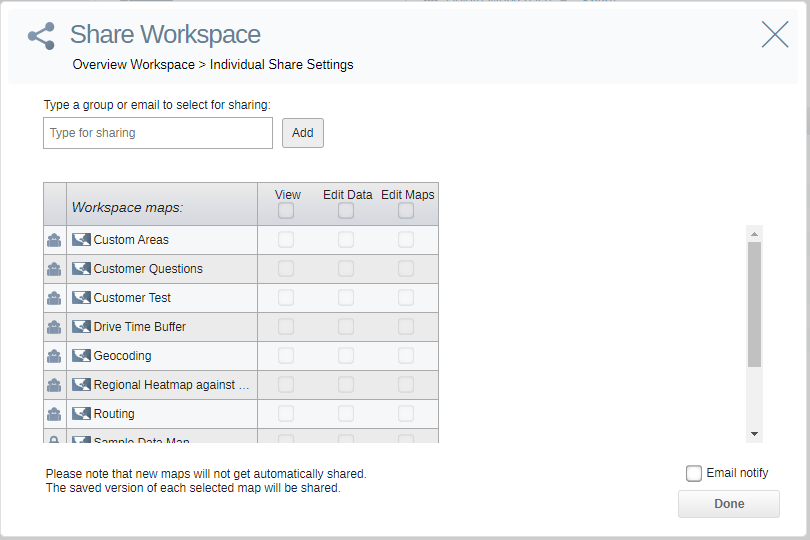
Click on the View Advanced Options link.
In the advanced options you can set specific permissions for specific maps.
- Enter the name of a group or individual email with whom you want to share the workspace and click on the Add button.
- Give the group or user the following permissions as needed:
-
- View – the group or user can edit the map specified
- Edit Maps – the group or user can edit the map specified
- Edit Data – the group or user can edit the data on the map specified
- Create Maps – the group or user can create new maps in the shared workspace
- Click on the Email notify check box if you would like to send an email to the user
- Click on the Done button to finish sharing.