Get Started with eSpatial Mobile
Mapping On The Go with eSpatial Mobile
eSpatial is used by sales and service teams across the world to help their field staff plan their day, optimize routes, and fill in gaps in the schedules to empower them while on the road. All this functionality is now even more portable using our brand new mobile solution. eSpatial Mobile is the perfect companion for field sales and service reps that need easy access to their customer data, in addition to creating optimized routes on the go.
Working from the palm of your hand, eSpatial Mobile packs a serious punch in its ability to help staff organize their day in the field.
Set Up Your Maps on Your Computer:
The eSpatial Mobile App is a companion application for eSpatial on your computer, which allows you to access your maps, run buffer analysis, and create routes from your mobile device. To get your maps set up, you must load the data using eSpatial on your computer. Sign up for a free trial here.
Download the App:
If you have an iOS or Android device, you can download the app right now from the Apple App Store or Google Play Store. If you are on any other smartphone operating system such as a Windows phone, you can access eSpatial Mobile via your browser by visiting this link on your mobile device. If you are a Salesforce user, eSpatial Mobile is available through the Salesforce App.
Log In To Your Account:
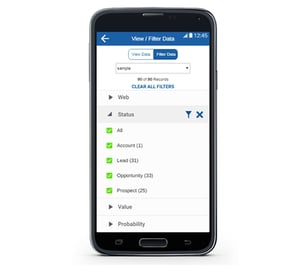
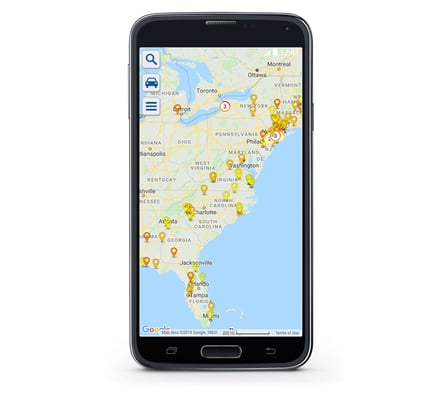
Use the same username and password that you use to sign into eSpatial on your computer. eSpatial Mobile will open on the last map you accessed on your computer. On this screen you will see three buttons on the top right.
![]() This is the Address Search Button. It will open up the Address Search bar and also give you the option to drop a pin on the map.
This is the Address Search Button. It will open up the Address Search bar and also give you the option to drop a pin on the map.
![]() This is the Routing Button. It will open up the routing functionality. Read More about that here.
This is the Routing Button. It will open up the routing functionality. Read More about that here.
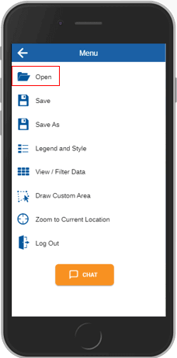
![]() This is the Menu Button. It will open up a selection of options to Open Maps, Save Maps, Filter Data, Draw Custom Areas, Chat with Customer Support, and Access the Help Center.
This is the Menu Button. It will open up a selection of options to Open Maps, Save Maps, Filter Data, Draw Custom Areas, Chat with Customer Support, and Access the Help Center.
Open Maps:
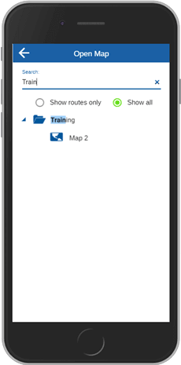
From eSpatial Mobile, you will be able to open any map in any workspace in your eSpatial account. You can decide to show all maps or to only show the maps with routes on them.
You can also search for particular map using the search bar at the top.
Legend and Style: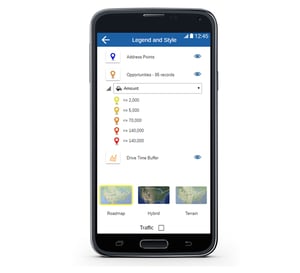
The Legend and Style screen allows you to see the datasets that are on your map. You can show or hide datasets from here using the “eye” icon.
You can turn on and off styling options by clicking into the Map Pin beside the dataset name.
You can change the value being color coded by selecting a different option from the drop down menu.
You can also change the basemap from this screen too.
View and Filter Data
The View/ Filter Data screen allows you to view the data on your map and filter it as you wish.
Change the dataset you wish to filter using the drop down menu at the top.
To filter the data, simply tap on the field you want to filter by and the options for filtering will appear.
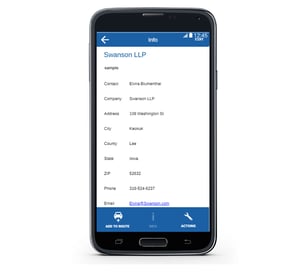
Point Information
When you tap on a point on your map and select the “Info” button, you will be presented all of the data associated with that point.
Each line of data comes from the columns in your original spreadsheet. The left hand column contains the column headers as per your spreadsheet.
Actions from a Point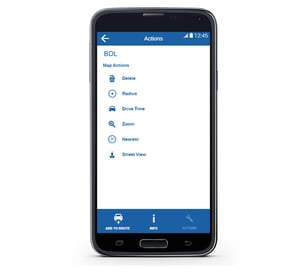
When you tap on a point on your map and select the “Actions” button, you will be presented with a number of actions available to you.
Delete: This will delete the point from your map and your dataset.
Radius: This allows you to draw a distance radius around the point.
Drive Time: This allows you to set a drive time zone around the point.
Zoom: This allows you to zoom to the location of the point.
Nearest: This allows you to identify the nearest points to the point you have selected.
Street View: This allows you to change to street view for this point.
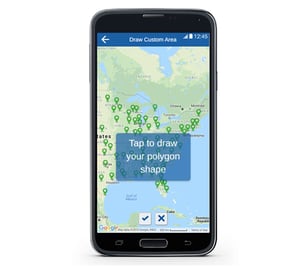
Custom Areas
You can draw custom areas (also known as polygons) around points on your map by going to the Draw Custom Area option within the menu.
Simply tap to create your shape and tap the tick at the bottom of the screen to confirm it.
Custom Area Actions
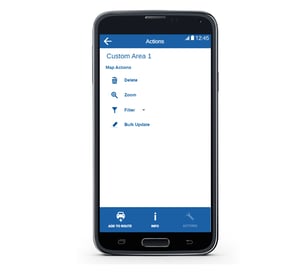
When you tap on a custom area, radius buffer, or drive time buffer and select the “Actions” button, you will be presented with a number of actions available to you.
Delete: This will delete the point from your map and your dataset.
Zoom: This allows you to zoom to the location of the point.
Filter: This allows you filter the data on the map to show only the points that lie within the custom area or buffer.
Bulk Update: This allows bulk update the data on your map.
Routing
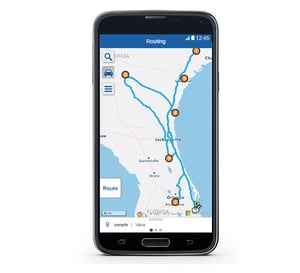
Points can be added to a route either individually or in bulk using custom areas.
Once the points are added you can then choose to optimize your route, set it as a round trip, or reorder the stops yourself.
You can also set a default stop time so that you can more accurately estimate how many stops you can make in the time you have for your travels.
Once you have created your route, you can then open each leg of the trip in Google Maps.
In-App Help and Chat
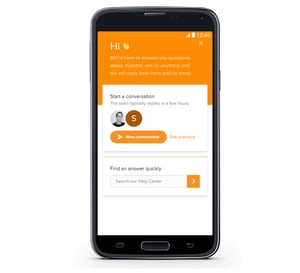
If you find at any time that you need help or you have a question about eSpatial Mobile you can access the frequently asked question in our help section, or speak to one of our mapping experts via in app chat.

