Creating New Optimized Territories
How to create brand new optimized territories using Account and Sales information.
NOTE: This is an Enterprise Feature, it is only available for users who have purchased our territory optimizer feature.
NOTE: Optimization is only available on the following datasets:
United States: US Counties, Zip Codes 2022, Zip Codes 2021 and Zip Code Tabulation Area's (ZCTA's)
United Kingdom: Postcode Areas, Districts and Sectors
Canada: Canadian Forward Sortation Areas (FSA’s) and Canadian Census Divisions.
The Territory Optimizer will help speed up the process to create balanced territories.
To create optimized territory alignments:
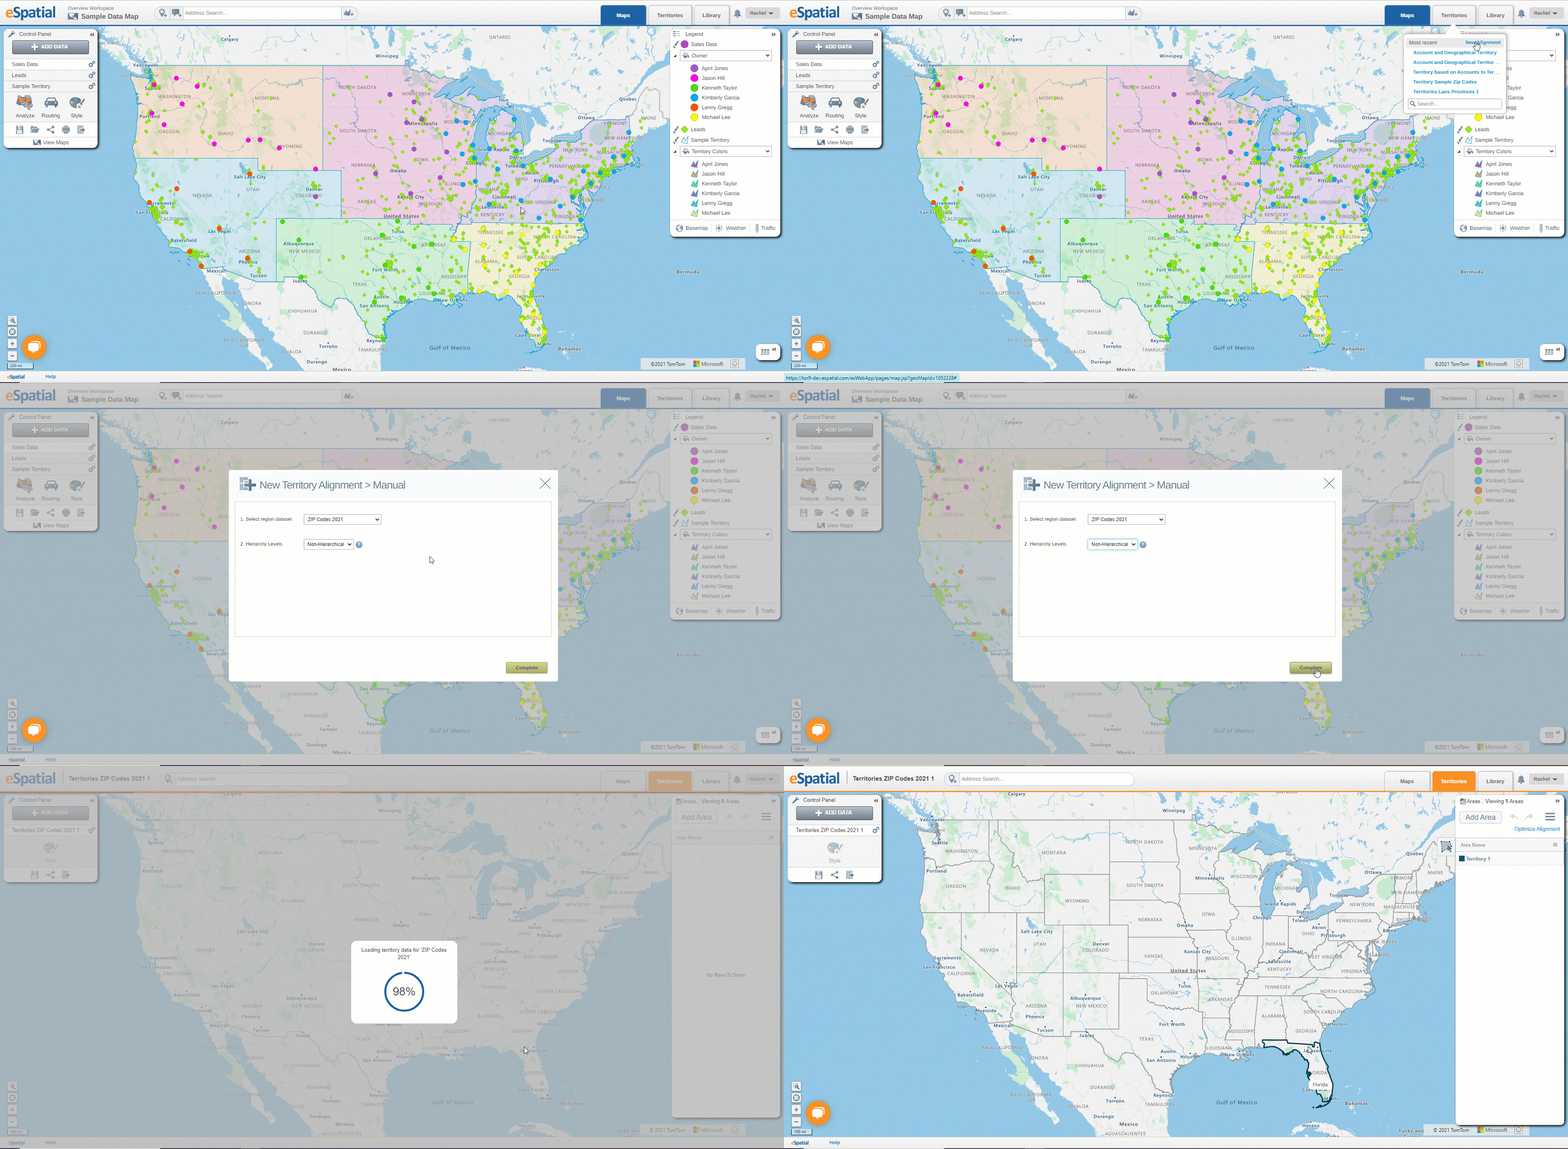
- Select the territory tab and select new alignment.
- Select create areas manually and the new territory window will display.
- Select your desired regional dataset (if you are creating a new territory hierarchy alignment, select the number of hierarchy levels) and select complete.
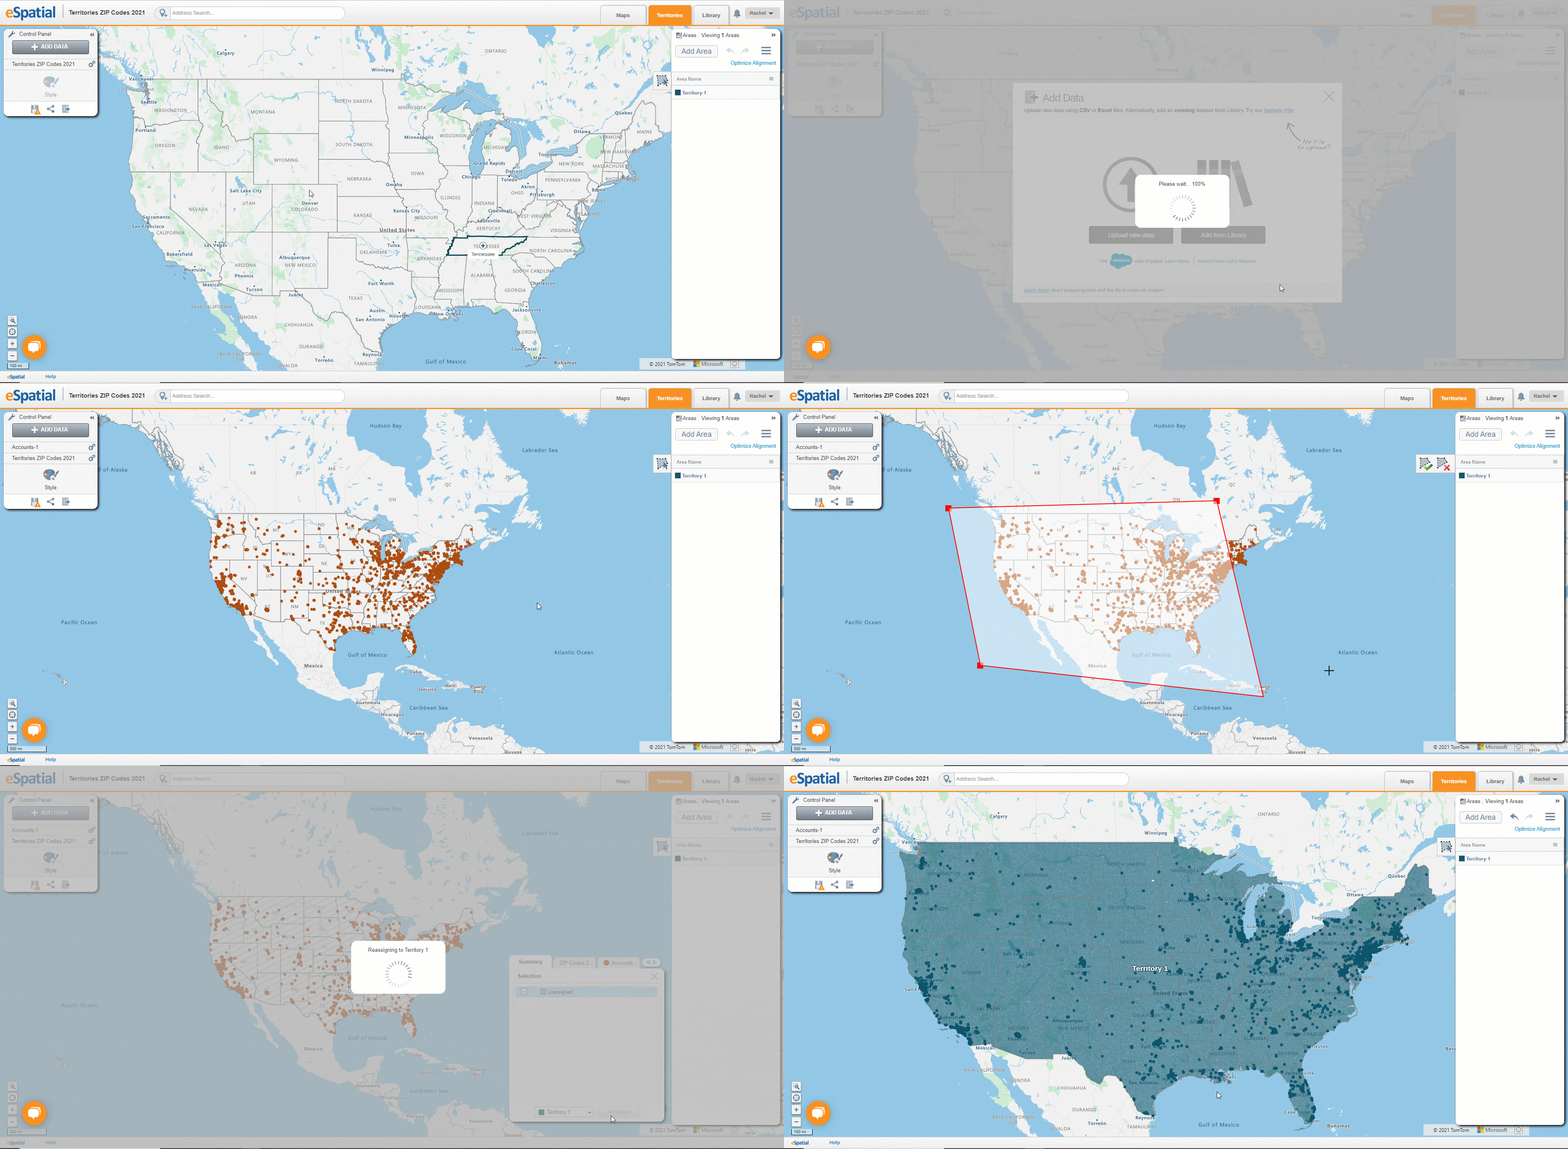
- When the territory manager has loaded, select add data and navigate to your account, sales or leads data (this will be the data used to create balanced territories).
- To create optimized territory alignments, you first need to establish an area you wish to create your optimized areas in. To do this select add area and using the select areas tool, add the entire area that you wish to create your territories in.
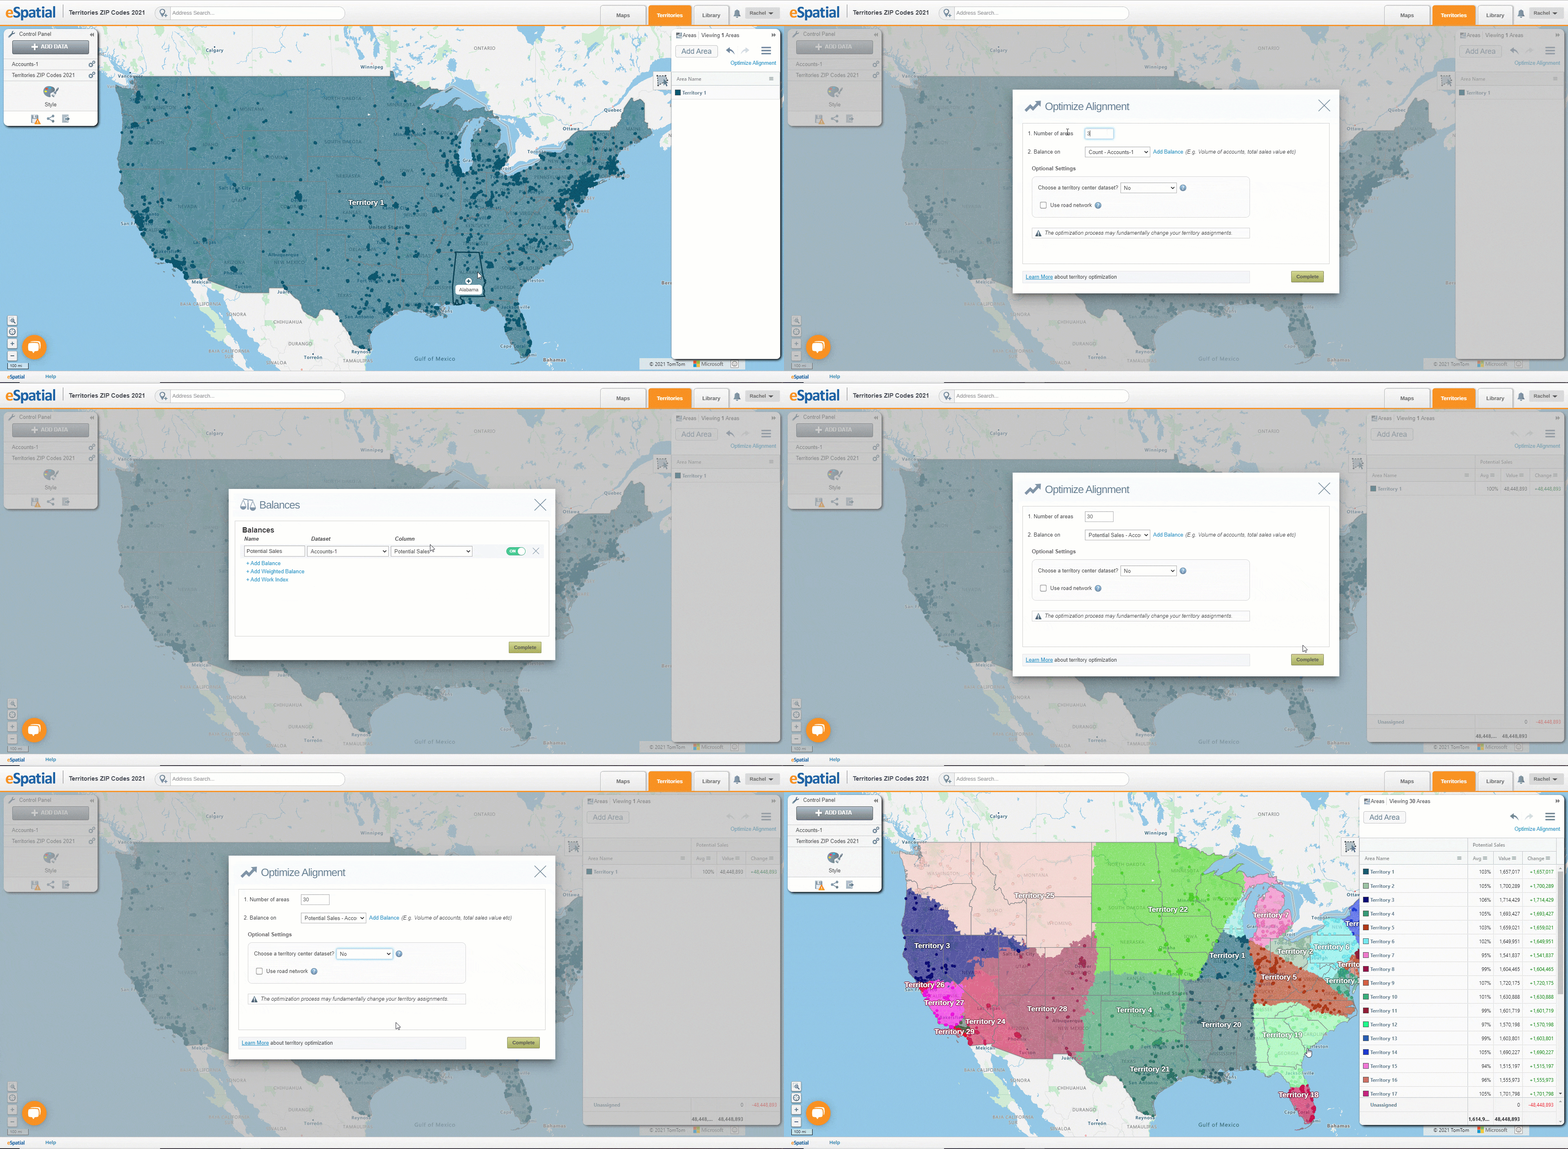
- Select optimize alignment to open the territory optimizer window.
- First select the number of territories you wish to create. This number should be based on the number of sales reps you have.
- Next select a balance you wish to create your areas based on:
- If you have not already created a balance, select add balance.
- You will be prompted to create a balance from your account dataset, such as the account count or potential sales value.
- If you select account count this will create territories with an equal number of accounts in them.
- If you select potential sales value this will create territories with equal sales values.
- Select complete to be brought back to the territory optimizer window.
- Select complete and your areas will be equally divided based on your chosen balance.
Choose a Territory Center Dataset:
If you wish to ensure your areas are geographically optimized according to the location of your salespeople’s home or office locations, you can add a territory center dataset. This is a separate dataset that displays your salespeople home or office locations.
To create optimized territories based on your rep or office locations:
- Select the add data button.
- Select upload new data.
- Navigate to your office/rep location dataset and add it to the territory manager.
- Select optimize alignment and ensure that your territory center dataset is selected in the choose a territory center dropdown.
- Select complete to create your optimized territories.
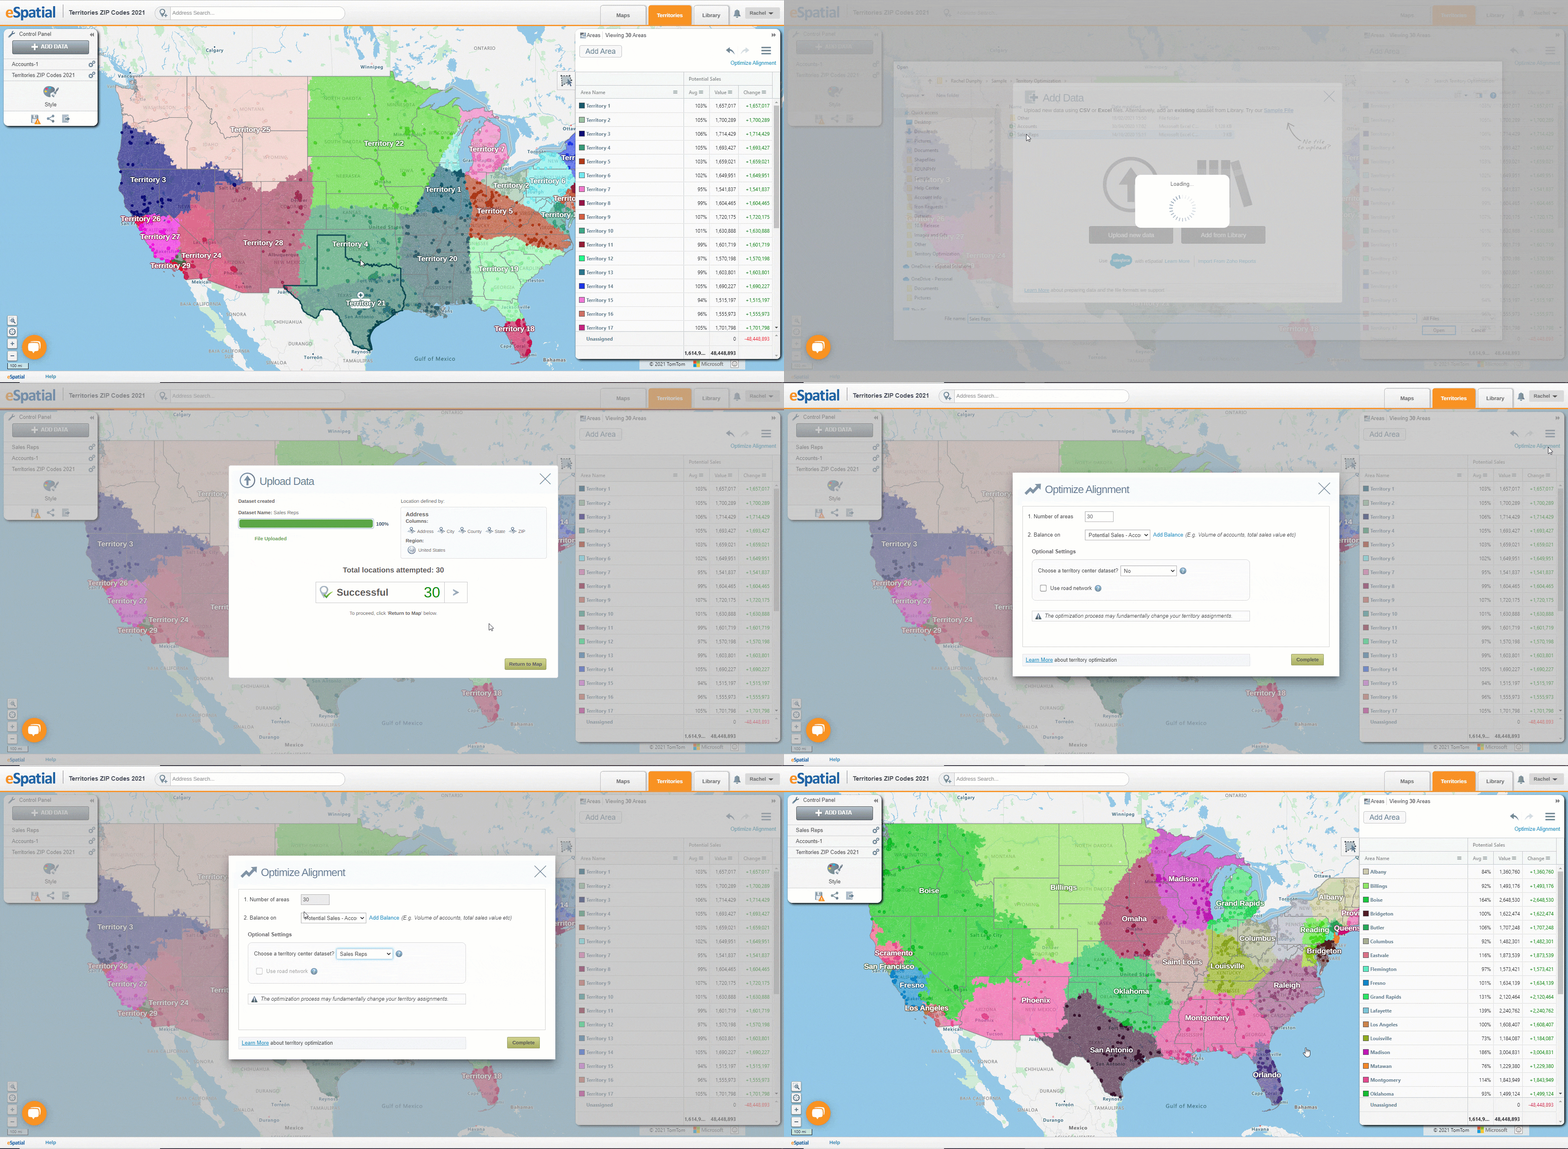
Note: If you select a dataset to use as your territory centers your number of areas will automatically be changed to match the number of office/salesperson locations.
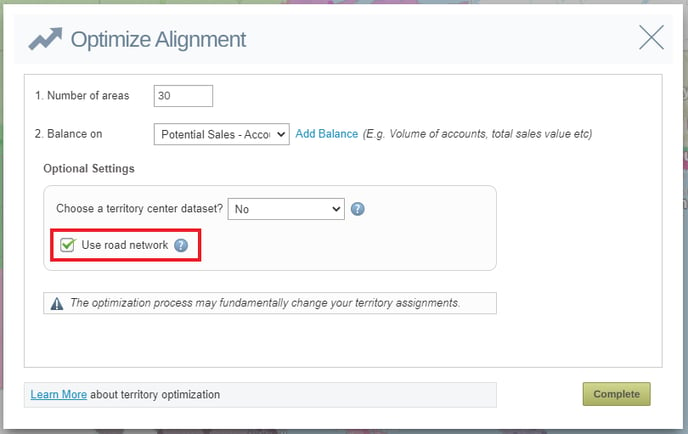
Use Drive Time Network:
Drive time allows you to create a territory alignment based on drive time rather than straight line distances.
This prevents your chosen base area being assigned to an area when they appear near a center point but are really a significant driving distance away.
Using the drive time network also takes into account bridges and bodies of water.
