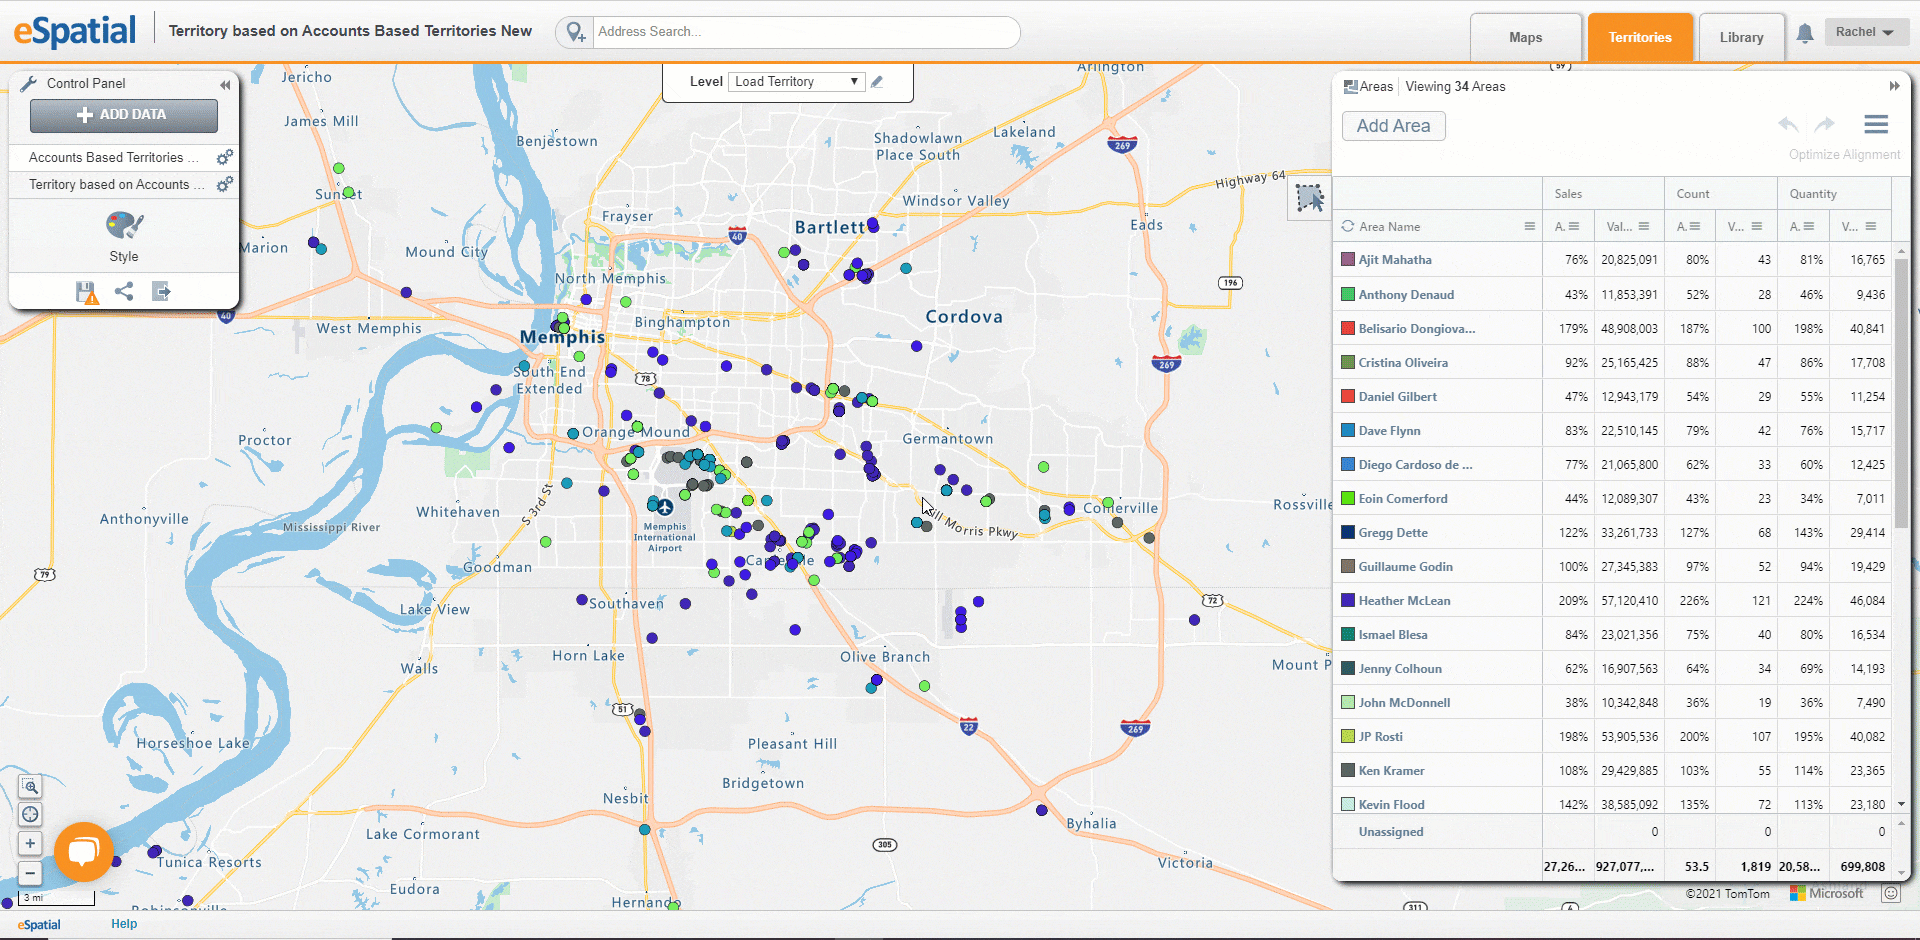
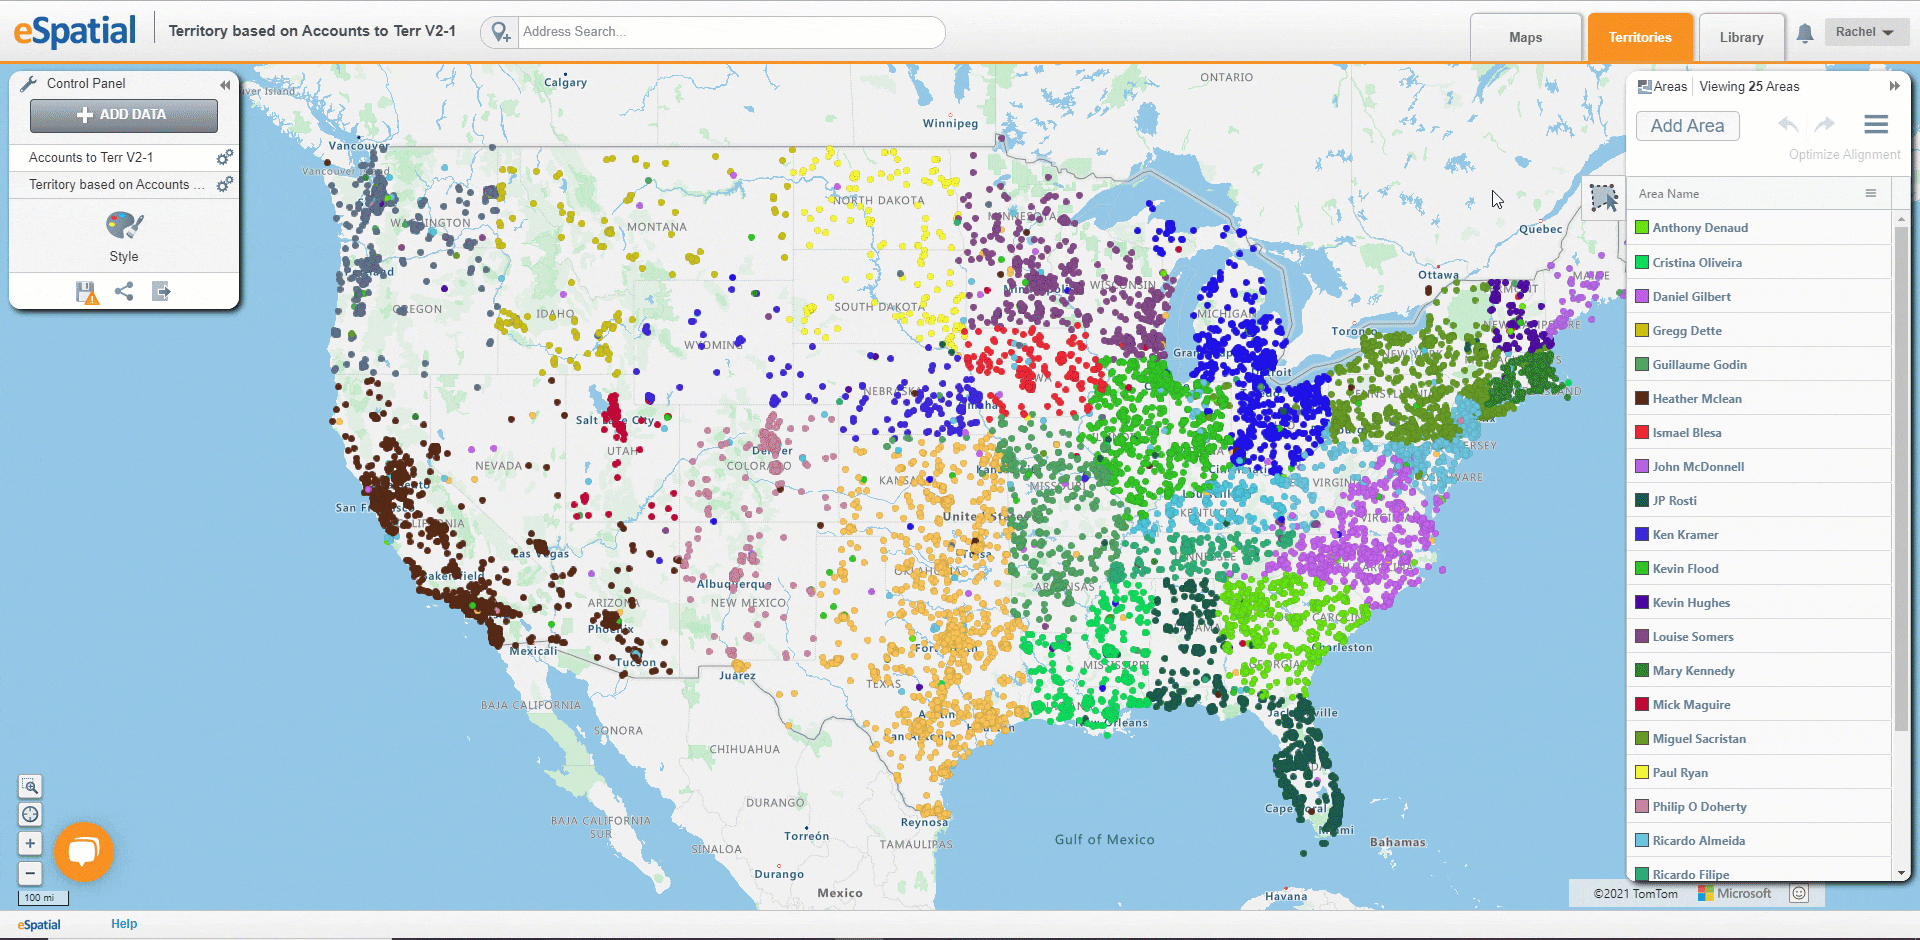
This territory is designed for companies whose territories don’t fit within a defined geographic area and who assign salespeople to key accounts, industries, specializations, parent accounts or other criteria beyond geographic area.
- Click on the Territories button in the Top Toolbar.
- From the drop-down select New Alignment. You can also edit your existing Territory Alignments from here.
- Select Points from File.
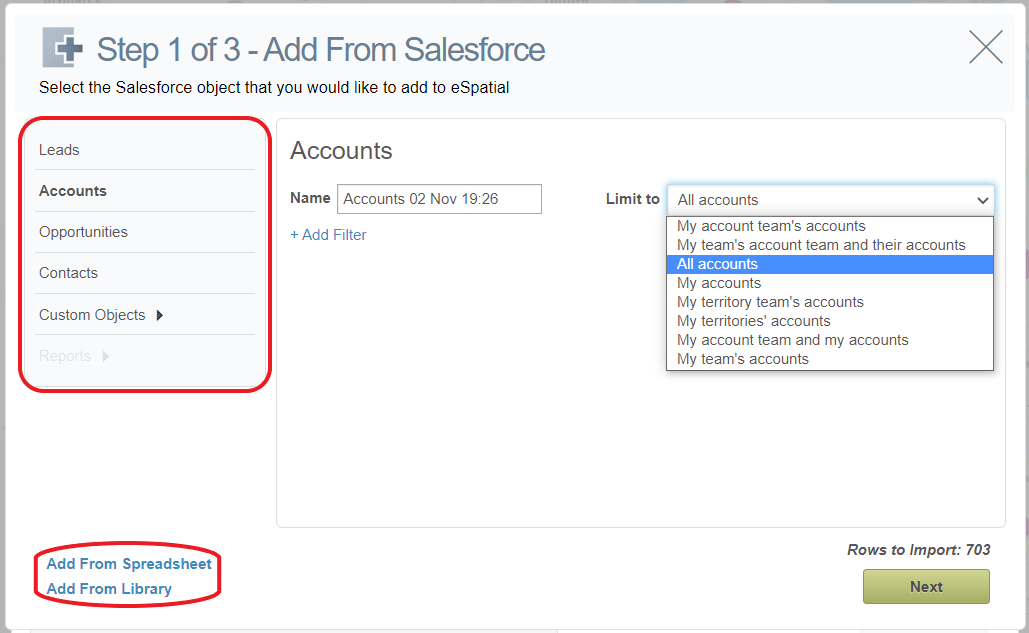
- From here you can add Salesforce data including default Salesforce objects, Custom objects, and Salesforce Reports. The Limit to option lets you decide which records you want to see. Data from a csv or excel file can also be added by choosing Add From Spreadsheet, while data from your library can be added by choosing Add From Library.
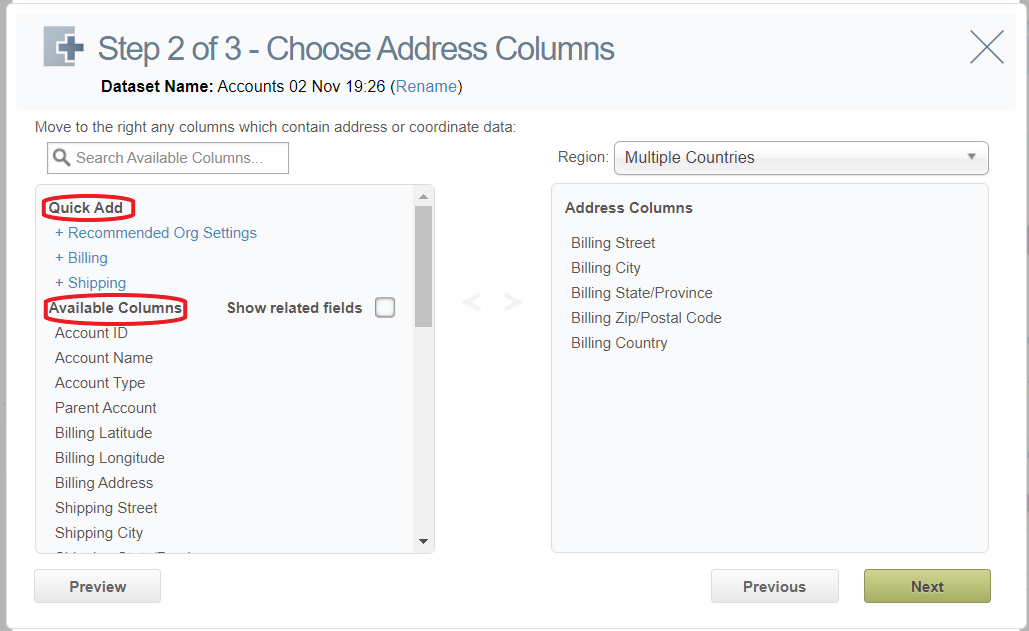
- Following this, address columns must be chosen. The two default options are billing and shipping, but you can also build your own customer address fields. These can either be added using the Quick Add option, or by selecting them from the available columns listed.
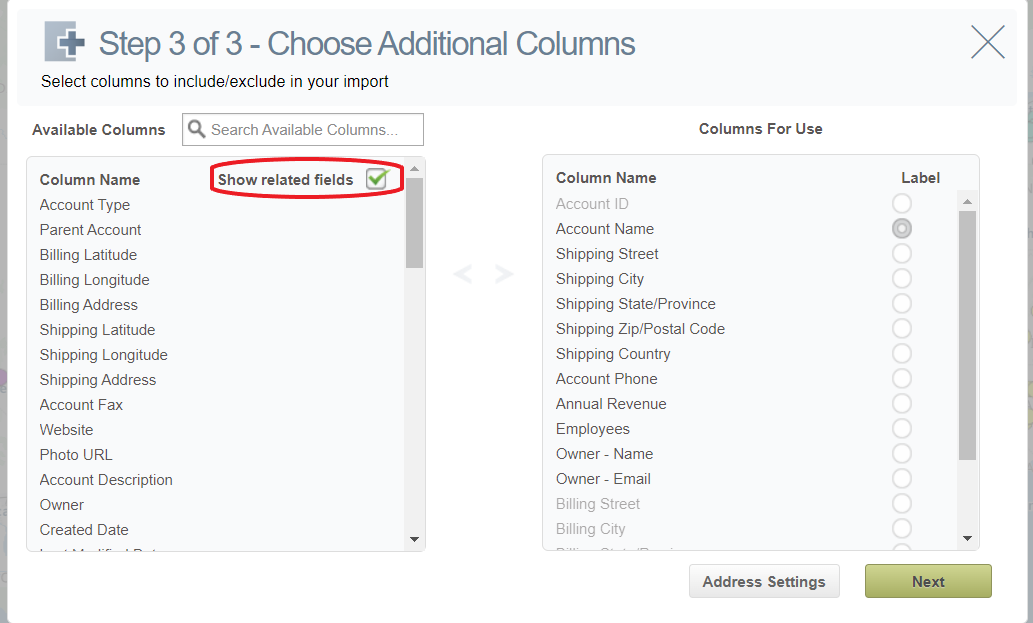
- The next step is to choose which columns you want to include in your import. To avoid clutter, related fields are hidden by default. To view all fields, check the Show related fields option.
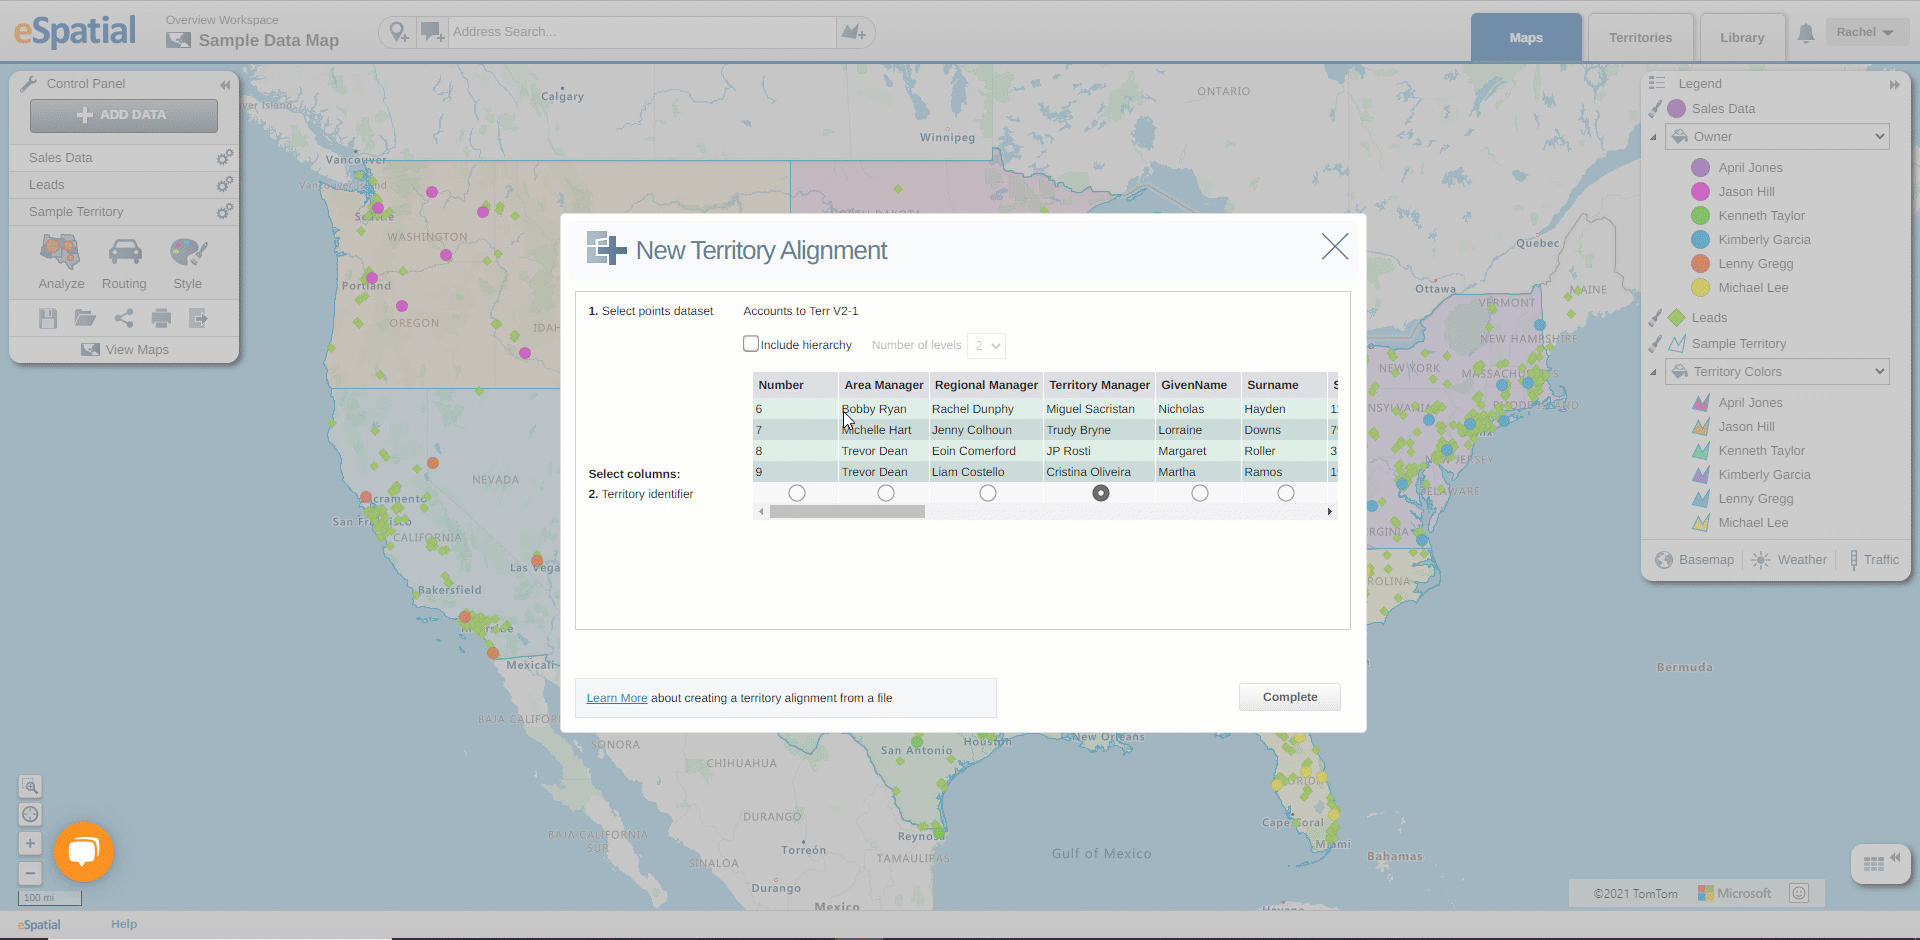
- The final steps are to choose your territory identifiers such as the account manager or territory owner. If your territories are hierarchical check the box to include hierarchy and select number of levels from the drop-down along with the respective territory identifier columns.
- Select complete and your territories will be created.
Reassigning Accounts/Points:
You can reassign your accounts/points in 3 ways:
1. Single Account selection.
- Click on the account you wish to reassign
- When the info box appears select add to selection
- The selection panel will then open where you can select the territory to wish to reassign the account to and then select reassign.
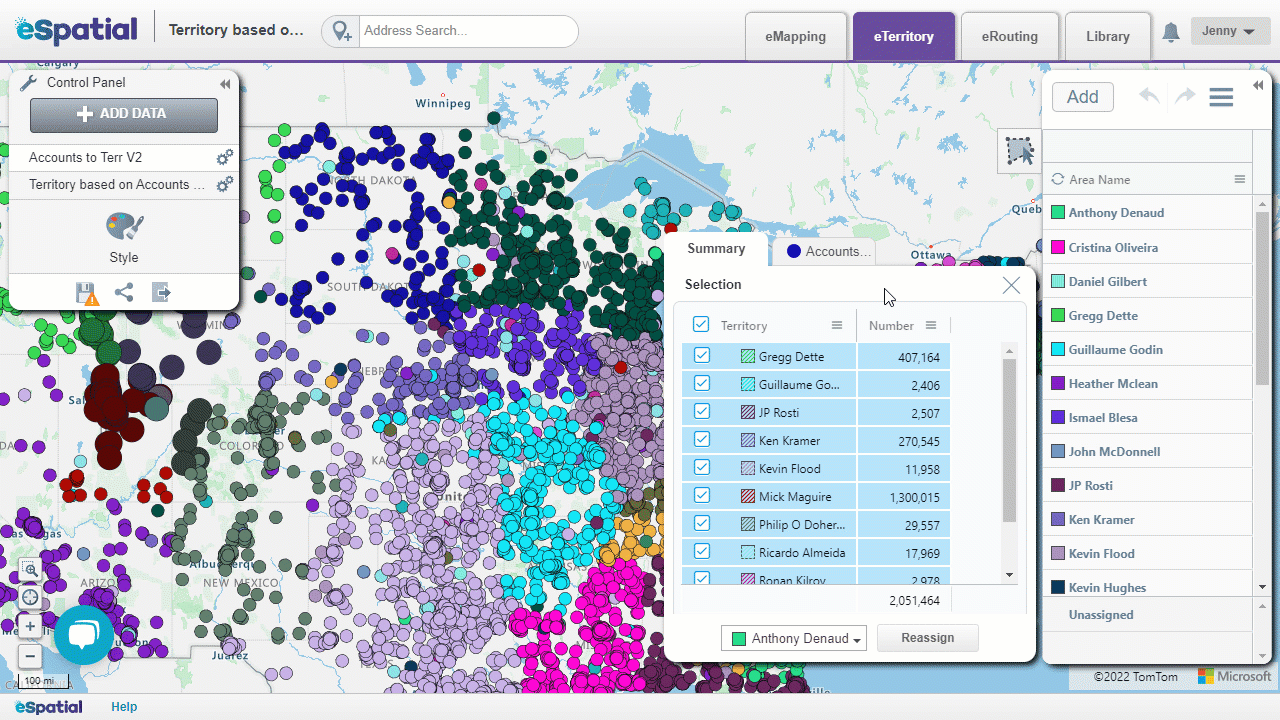
2. Select Areas Button.
- Click on the Select areas button.
- Then left click on the map to start drawing an areas around the points you wish to select.
- Select the check icon to select all the points within your area (you can also double click to confirm the area). The x will cancel the area drawn.
- When the selection panel appears, review the accounts/alignment selected. If you do not want to reassign the accounts, uncheck the box.
- Select the territory you wish to add the accounts to and select reassign.
- To add additional fields to the selection panel, click on the hamburger icon beside the field name in the selection window and check on the fields you wish to display. Fields used in balancing can be added to the Summary and Region Tab. All data fields are available to be added to the points dataset tabs.
3. The Table:
- Users can also use the territory manager table to assign and reassign accounts. To do this, Open the table by going to the hamburger icon and selecting the table icon.
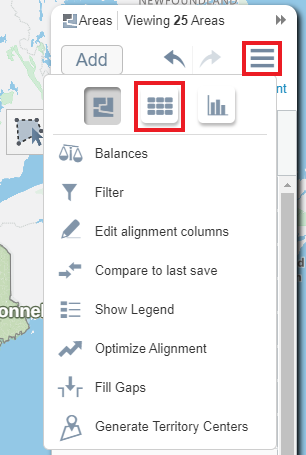
- To move accounts to another territory, select the checkbox beside any accounts you wish to move, select reassign, and then choose the territory you wish to move it to.

Syncing and Publishing
This feature will only be available in points-based territories. Both the sync and publish buttons will appear in the Control panel as seen below.
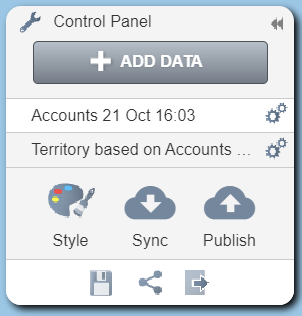
Syncing
Syncing allows you to refresh the Salesforce data present on your map. This means that any unpublished changes made in eSpatial will be overwritten from salesforce. When using this option, it is important to be cautious, as any unpublished changes made in eSpatial will be overwritten from salesforce, including any changes to territory alignments and additional field values.
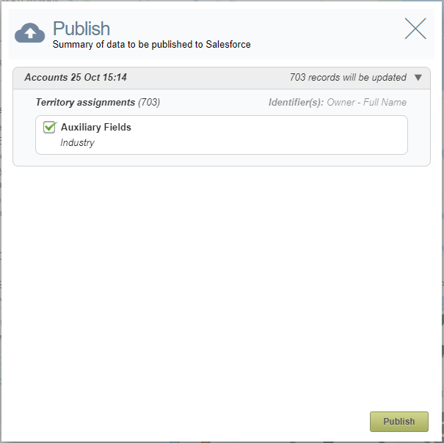
Publishing
The publish option allows you to overwrite the data within salesforce with changes that you have made in eSpatial. This works the opposite to the sync function, essentially pushing data from eSpatial to Salesforce. Changes made to accounts such as assignments and edits will be pushed into Salesforce directly from your eSpatial territory using this function.
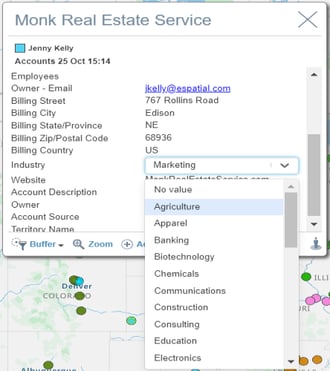
Updating Additional Territory Fields
After importing your accounts certain fields can be edited. These are known as Additional fields and can be found when the pen icon appears when the info pop-up is open.

Clicking the pen icon will either allow you to make edits by either bringing up a list of options that you can select from or allowing you to change the field by typing in the text box.
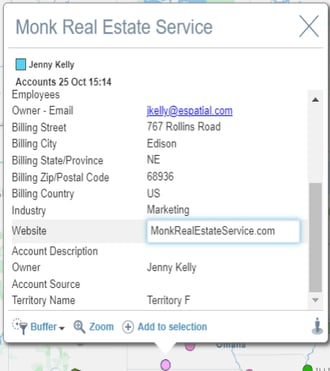
NOTE: There are certain restrictions regarding which additional fields can be edited. Any date/numeric, address, email or phone type fields cannot be edited. In addition to this the primary territory field(s) will not be editable.
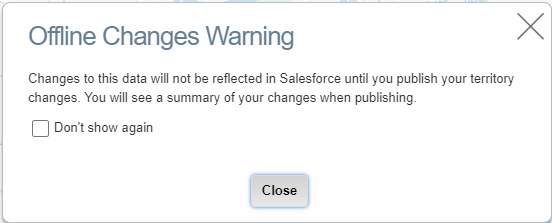
NOTE: This editing will not work the same as in eMapping. Any edits performed will be kept in eSpatial until a publish to Salesforce has taken place. When editing an eligible additional field, a pop-up will appear giving a warning about this
After editing has been completed and the publish to Salesforce option has been selected, any additional fields that have been edited will appear in the publish summary before any changes are made to Salesforce.
Note: This type of editing is also available to be performed on a second Salesforce dataset such as opportunities, where different additional fields can be chosen for editing.