Accounts based Territories - Create from Uploaded File
Creating a Account/Point based Territory from an excel/csv file.
This territory is designed for companies whose territories don’t fit within a defined geographic area and who assign salespeople to key accounts, industries, specializations, parent accounts or other criteria beyond geographic area.
- Click on the + Build Territories button in the Top Toolbar.
- From the pop up, click the Account based option.

- To Build an alignment based on your own data, select the Upload Territory file option.

- Select the csv or excel file you want to use to create your territory alignment
- Choose your location settings whether locating your data by address columns or latitude/longitude co-ordinates.

NOTE: You can edit the columns used to locate your data by selecting change settings and manage location columns.
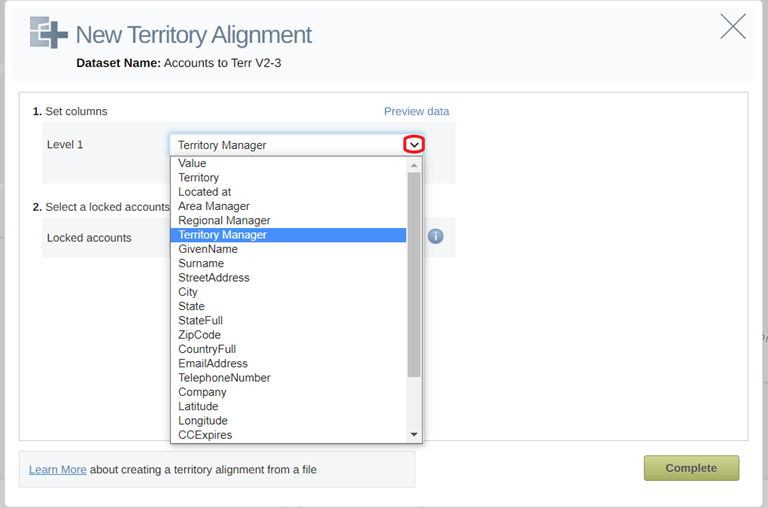
Next you must select the territory identifier such as the territory owner or the regional location.

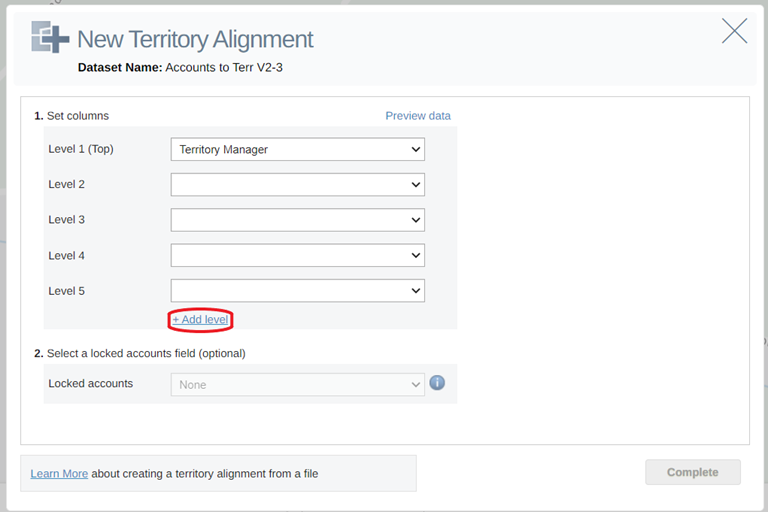
If creating hierarchical territory alignments, click the + Add level button to add a hierarchy level. You can add up to 6 levels of Hierarchy.

6. Select Complete and your territories will be created.
