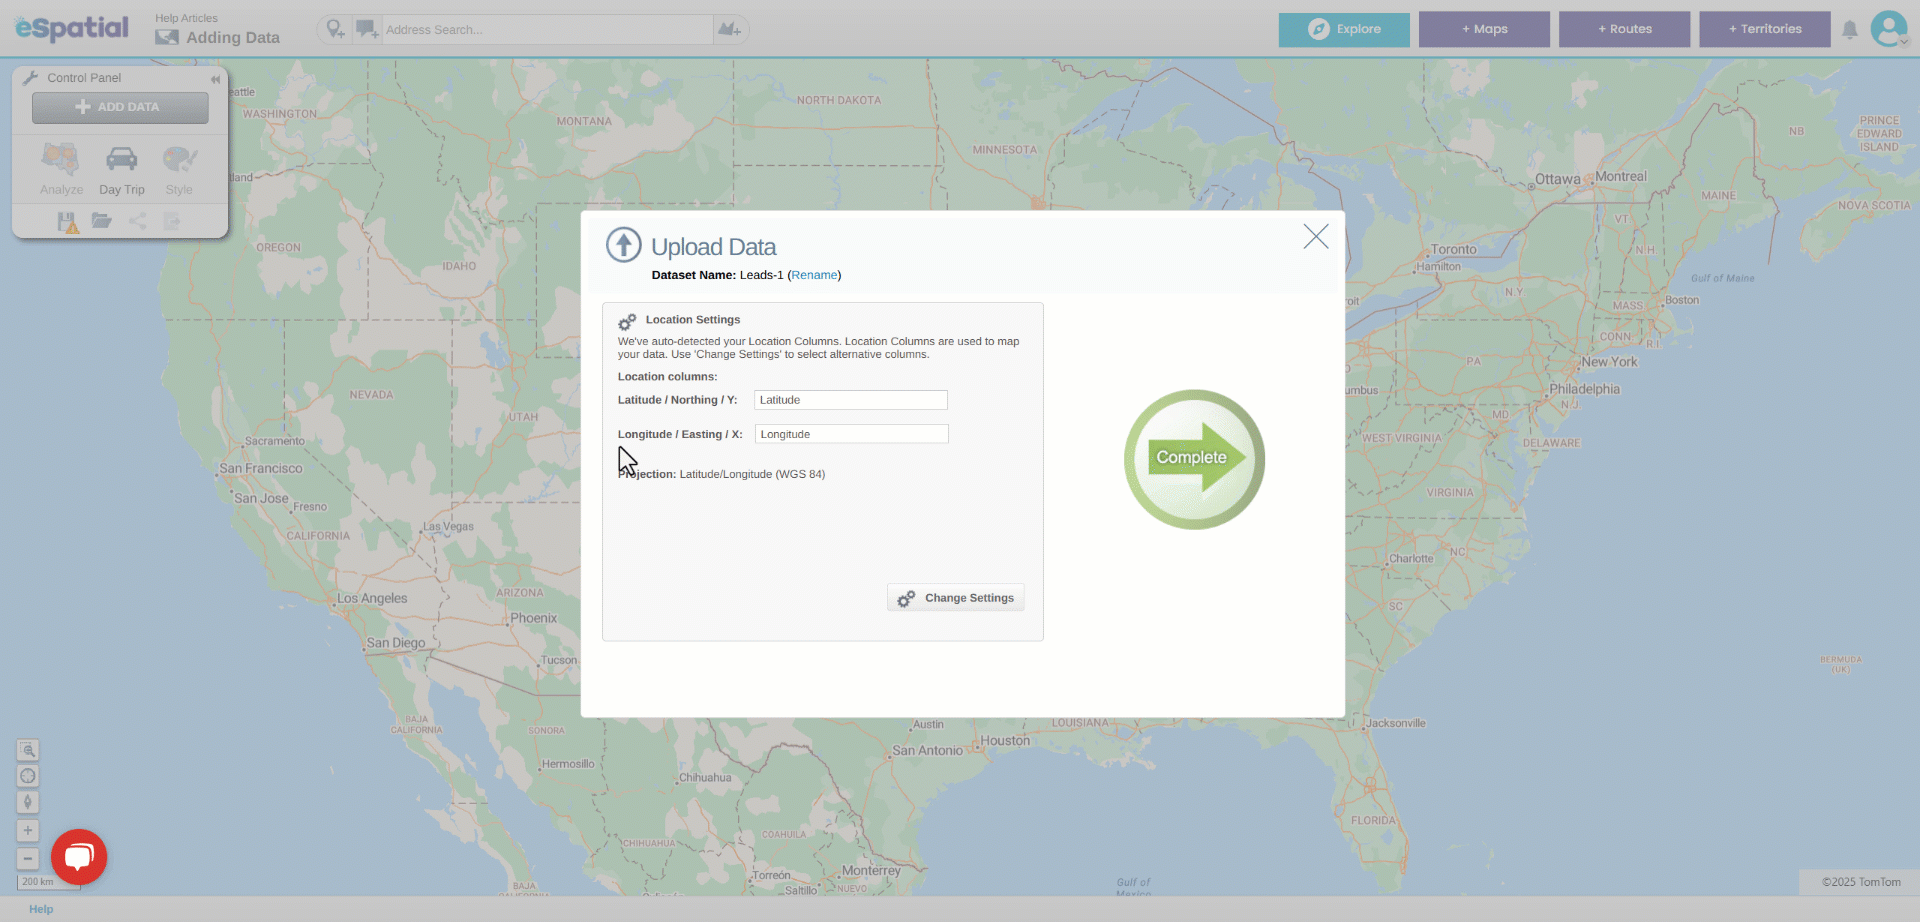
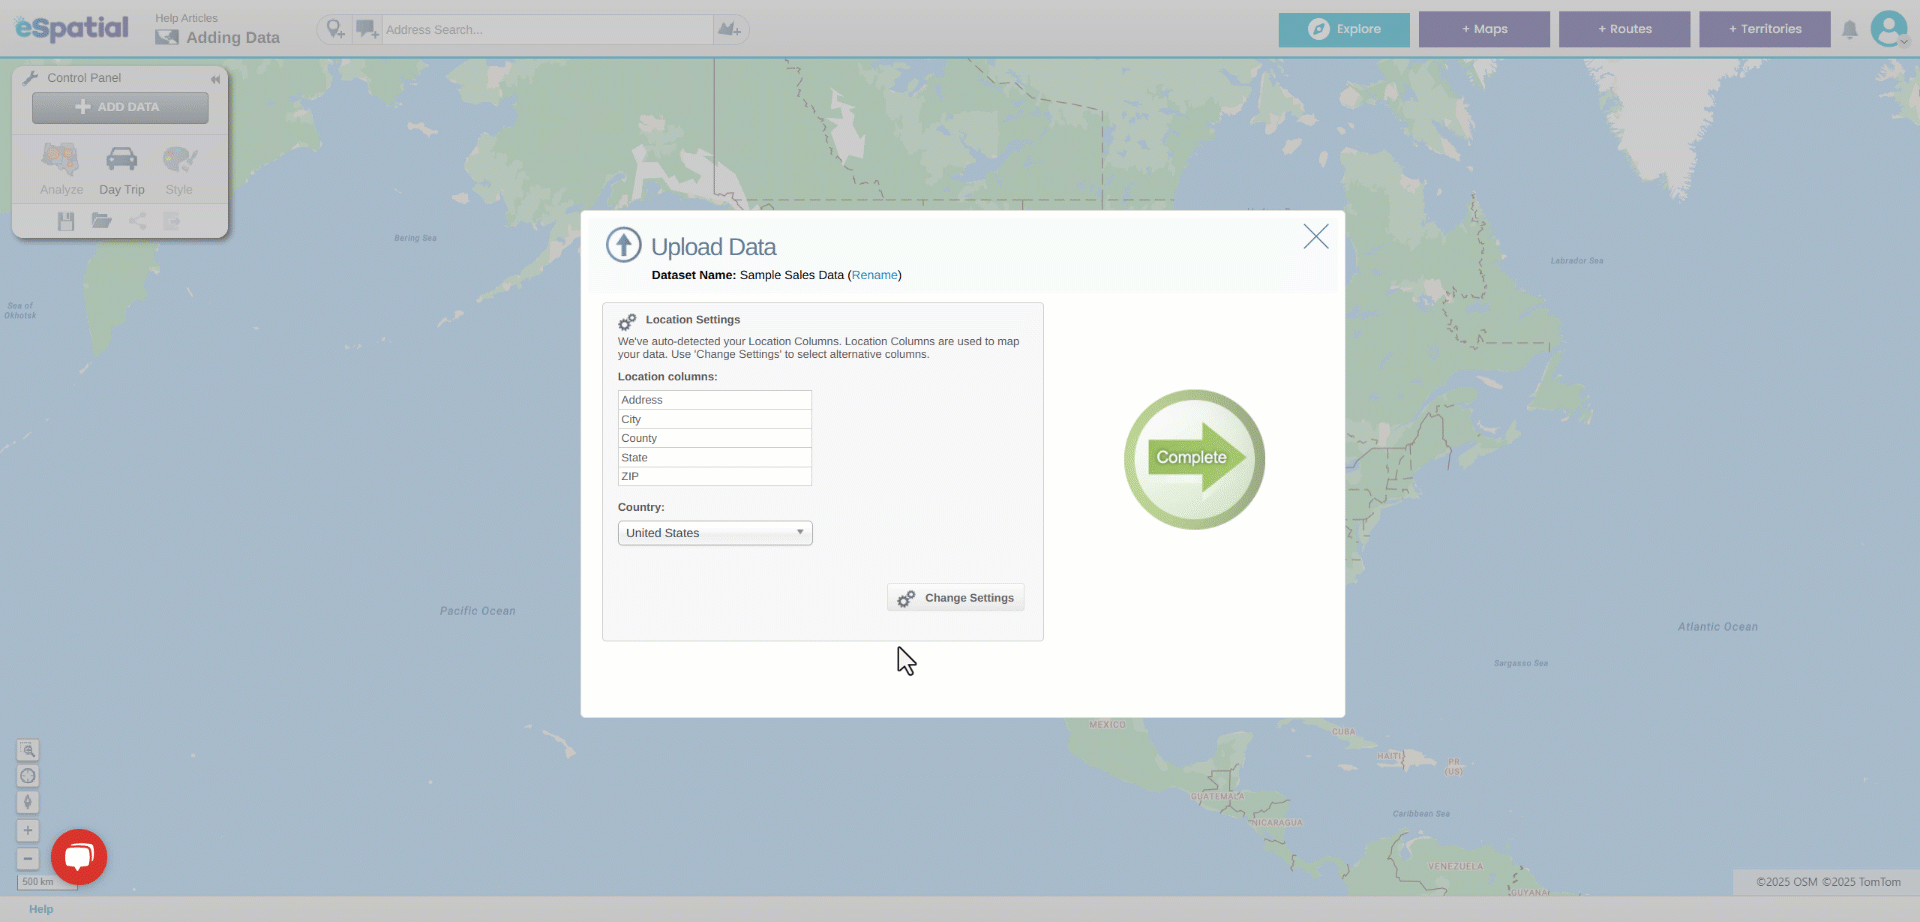
eSpatial will find the location fields in your data. These location fields can be Address or Coordinates. If you are not happy with the fields it chooses you can change these by clicking on the Change Settings button while you are adding data.
- Select the Add Data button in the Control Panel. This will open the Add Data window. Select Upload File and navigate to your dataset.
- To edit the columns used for location select Change Settings in the bottom right corner.
Change Settings using Address for location.
3. Use the arrows to move the required field from your data file into the Used for location table or move columns being used for location to your data file. You can also drag back any that have been selected in error.
4. Drag the fields in this table to reorder them the top field will be used first when plotting pins.
5. Click on the OK button to return to the upload process.
6. Enter the region in the Region Field, if all of your data is in one region or Select Multiple Regions if it is in more than one region. A region can be a country or other area.
Change Settings using Coordinates for location.
3. Use the dropdown fields to choose another field in your csv file for latitude and longitude.
4. Enter part of a new projection in the Find/Change Projection box to select another projection system.
5. Click on the OK button to return to the upload process.