If you have a Multi User account, here's how to manage accounts and privileges.
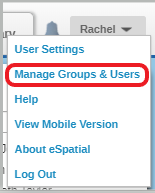
Manage Groups and Users is found by clicking on your Account Name in the top right corner of eSpatial.
In here, you can determine the mapping permissions users have using Groups; every users must be assigned to at least one group and the group determines the permissions they have.
By default there will be two groups created:
- Admin Group – this group will have all permissions.
- User Group – this will have all permissions EXCEPT Administer Groups and Users
The first user on an account will be assigned to both groups.
Each group can be assigned a set of permissions which will decide the access those users will have to certain functions within eSpatial.
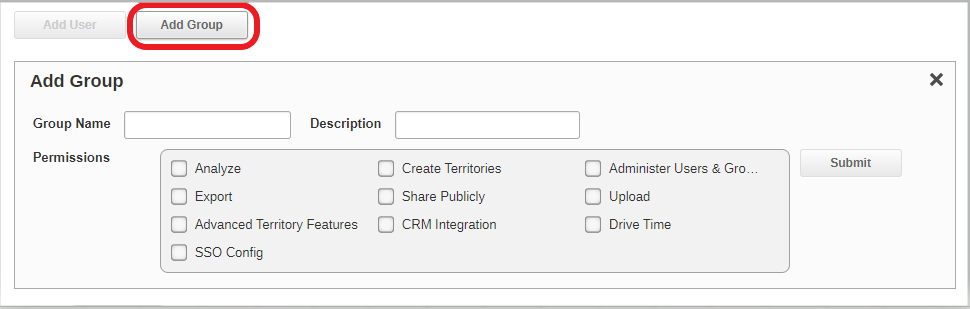
Creating a New Group
Under the add group tab admin users can create new groups and assign eSpatial permissions to them. To add a new group:
- Select the add group button.
- Give the group and name and description
- Click on the permissions you want to give them
- Analyze – users can add analysis to a map.
- Create Territories – users can create territories.
- Administer Users & Groups – users can add and edit Groups and Users.
- Export – users can export and print.
- Share Publicly – users can share publicly.
- Upload – users can upload data.
- Drive Time - User can calculate drive time distances
- Advanced Territory Features - (this is only available to Team Plus accounts and above) – users can create hierarchical territories.
- CRM Integration - (this is only available to Team Plus accounts and above) - Add data from your CRM software such as Salesforce.
- SSO Config - (this is only available to Enterprise accounts) Sign into eSpatial with you companies Single Sign on Software
- Select submit to save the new group.
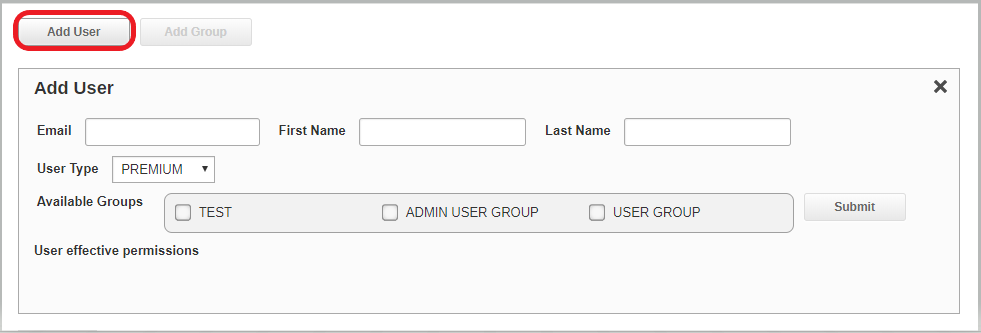
Adding a New User
Admin users can add new users to their account by:
- Selecting the add user button
- Enter or edit the Users Email, First Name and Last Name.
- Click on the groups you want to add them to.
- Click on the Submit button.
- The new user will receive an email containing their new password.
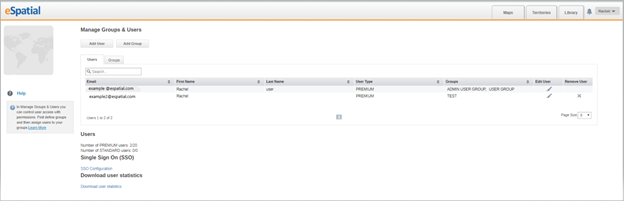
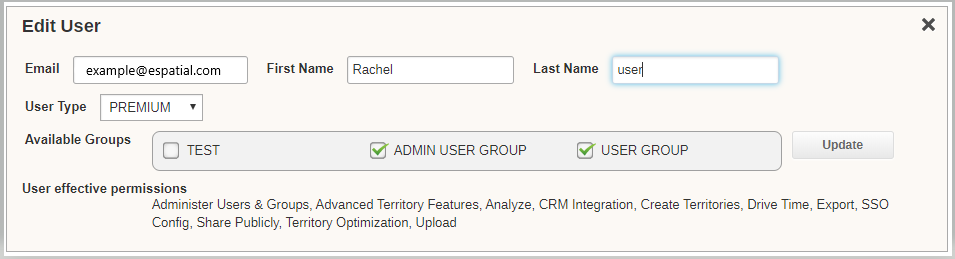
Editing and Deleting Users
Under the user tab admin users can edit the permissions of each user as well remove users from their account.
- You can remove users by selecting the X button under the remove column.
- You can edit which groups the user is member of by selecting the pen icon underneath the edit user column, therefore giving the user its eSpatial permissions.

- In the edit user window you can edit the users email address, their user name, the type of user and which groups they are assigned to. Based on their assigned groups with User effective permissions will vary.
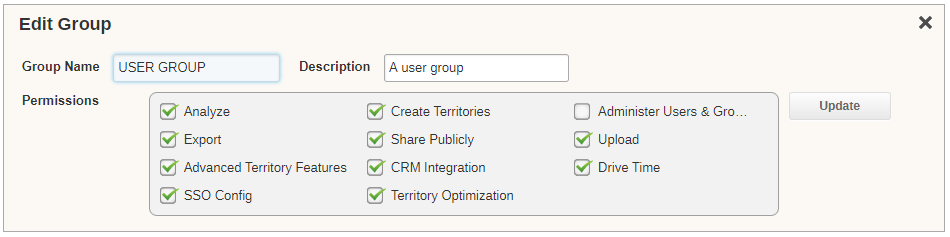
Editing and Deleting Groups
Under the group tab, admin users can edit the permissions allocated to each group and delete group types from their account.
- You can remove groups by selecting the X button under the remove group column.
- You can edit the eSpatial permissions granted to each group by selecting the pen icon underneath the edit group column

- In the edit group window you can edit the group name and description as well as set the group eSpatial permissions